Punchy kicks with Wavetable
1 Two layers
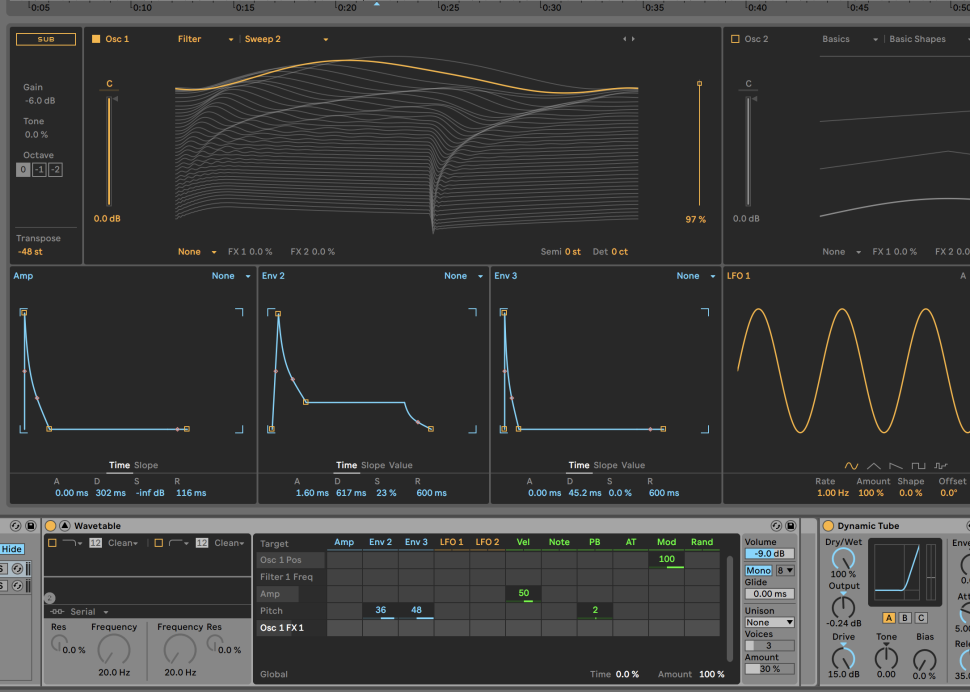
While synthetically generated kicks usually sound more lively thanks, they often turn out unpleasantly massive and raw, in a negative sense. To create powerful, but also mix-friendly kicks, we divide them into two parts: One for the attack and the other for bass-heavy sustain and release. First, create a new track and load Ableton‘s Wavetable synth.
2 Basics
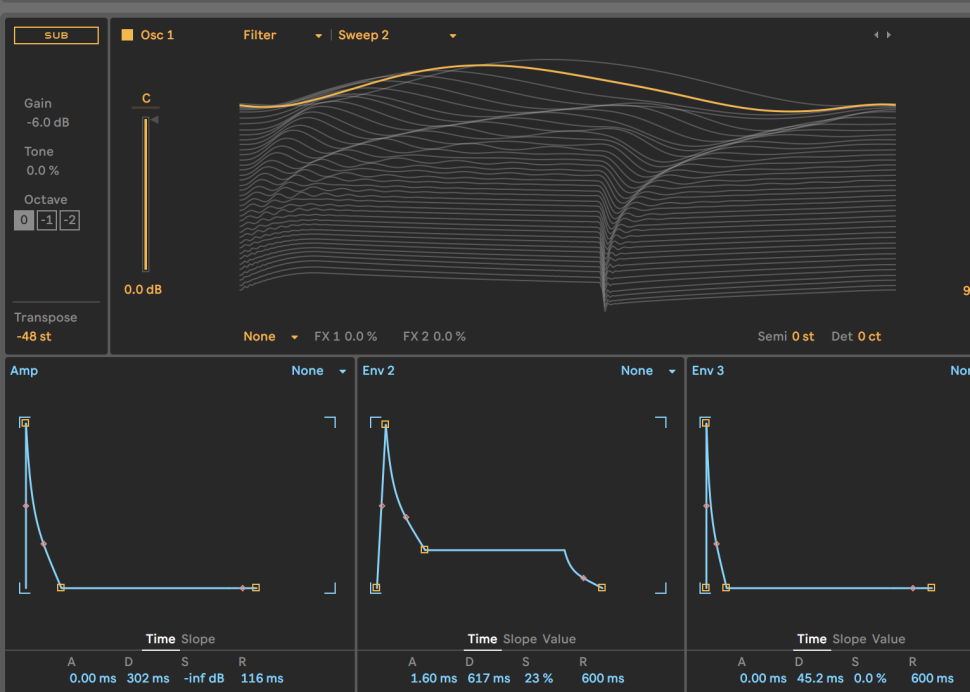
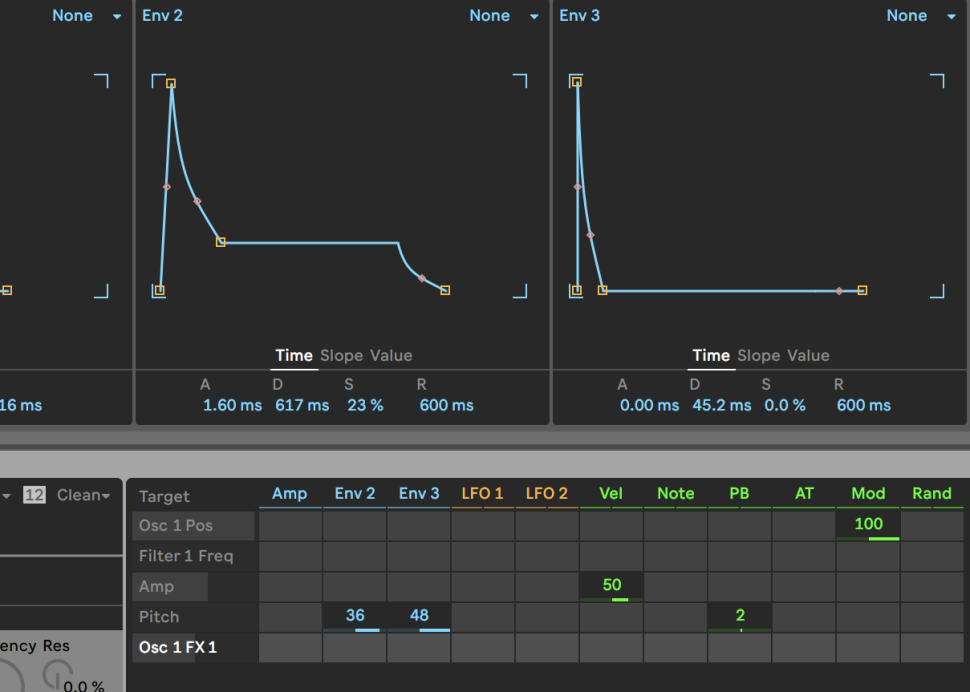
Transpose the sound 48 semitones down and set the amp envelope‘s sustain to 0 and decay to around 300 ms. As a basis for the sound, we use the waveform Sweep 2 from the Filter category, alternatively the Triangle of the Basic Shapes does the trick. The snappy attack is quickly created: Connect Env 2 and Env 3 with Pitch.
3 Sweet Spot
For now, an intensity of 50 is sufficient, but it is important to find the sweet spot in combination with the envelopes. Env 2 provides the “beefy” part of the kick, so we set a decay value longer than 600 ms. Env 3 provides a short click with a decay of 45 ms and a sustain of 0. Setting up decay and its effect on pitch right are the key to a snappy attack.
4 Reduce boominess
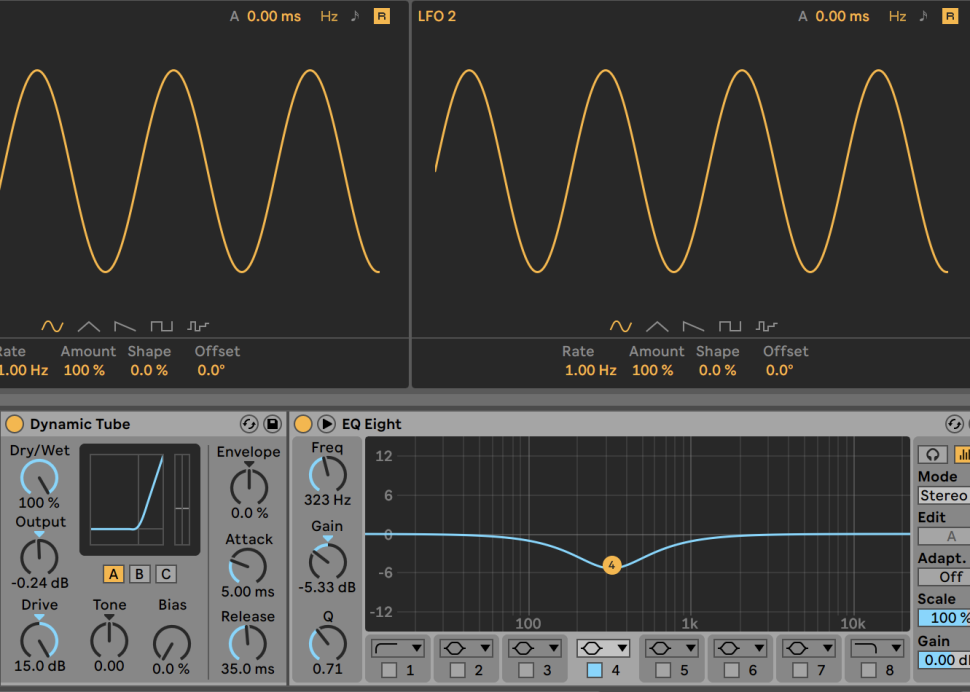
Your taste also plays an important role here. For us, the decay values of 600 ms and 45 ms with modulation intensities of 36 and 48 on pitch worked well. After that, we gave the kick more power with the dynamic tube effect with a drive of +15.0 dB as well as an EQ that removes the boominess around 323 Hz with a gain of -5 dB, making the kick less brute.
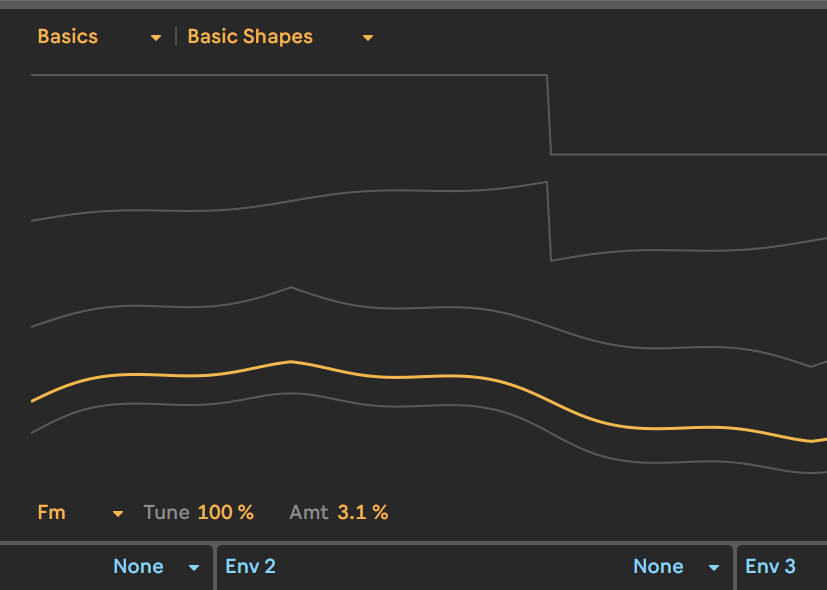
5 FM and filter
Click on the wavetable and use CTRL+G or CMD+G to create an Instrument Rack and load a second wavetable for the bass part. Here, we use the sine waveform, but activate the Fm effect with Tune set to 100% and Amt set to 3.1%, which makes the sound richer. We also activate a 24 dB low pass filter and set the cutoff to 9 o‘clock.
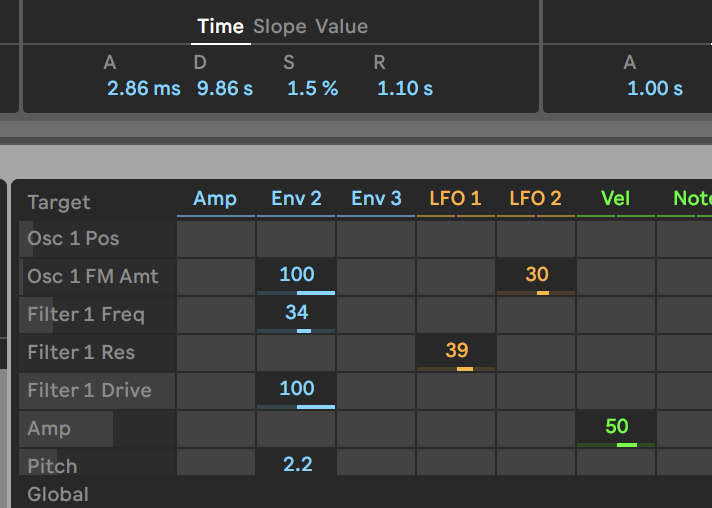
6 Motion in the sound
Now it‘s time to fine-tune the sound in the mod matrix: Env 2 modulates the Osc 1 FM Amt with a slow decay of 9 s and an intensity of 100%. We also set up the following modulations: Filter Freq 1: 34%, Filter 1 Drive: 100% and Pitch: 2.2%. The two LFOs modulate Filter 1 Res with 39% and Osc 1 FM Amt with 30%. This keeps the bass alive and powerful and leaves room in the mix for other elements.
More workshops?
In addition to our fixed series for Cubase, Logic, Ableton Live, Maschine, MPC and FL Studio, each beat issue contains page after page of useful workshops and tricks for producing, jamming, mixing, mastering, arranging and many other topics. So subscribe to Beat and don't miss any more tips.
Want more? Get more!


Subscribe to the digital edition of BEAT Magazine via Plugins-Samples.com and get more gear, in-depth workshops, reviews and 11 GB exclusive plugins and new sounds with every monthly issue!
Subscribe to Beat Magazine for only 4.99€ per month