Recording Workshop: Wie nehme ich Vocals richtig auf?
2 connection
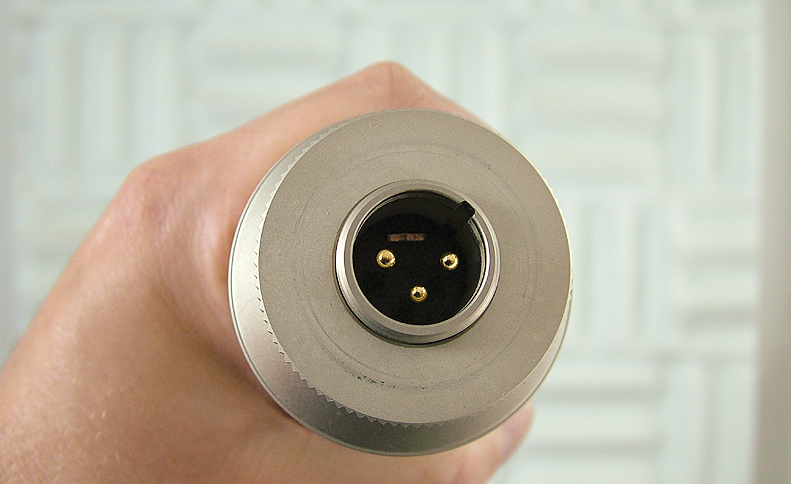
Microphones are connected to mixers, preamps or the audio interface using XLR connectors. They provide a very low level, which is very susceptible to interference. That is why the signal is transmitted symmetrically, i.e. normally and phase inverted, which makes it easy to remove interference.
3 Polar pattern
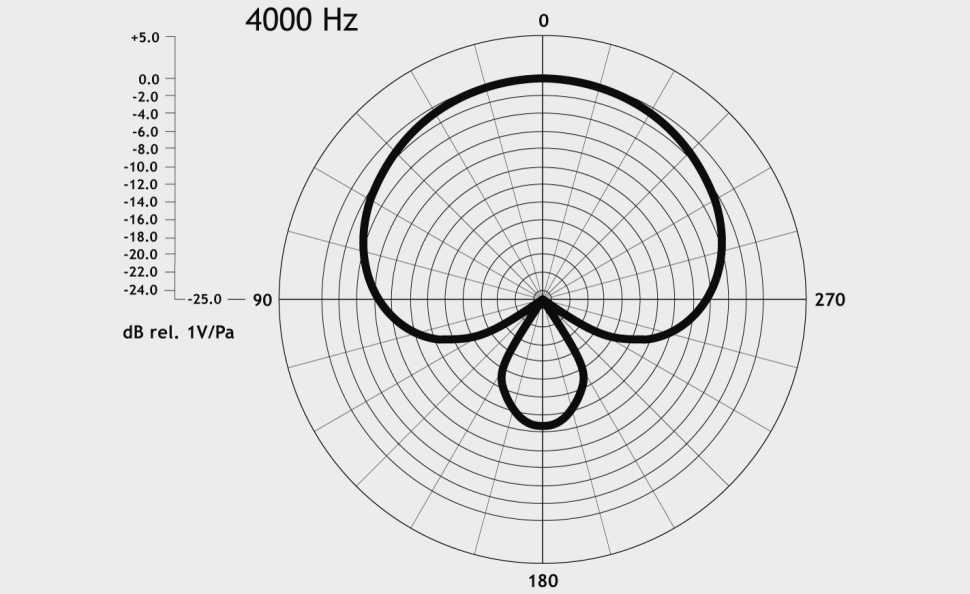
Unlike dynamic models, condenser microphones require a 48-volt bias to operate, which can be activated on the preamp or audio interface. A distinction is made between the three main directional characteristics: omnidirectional, figure-of-eight and cardioid. The latter has proven itself in vocal recordings.
4 Pad circuit
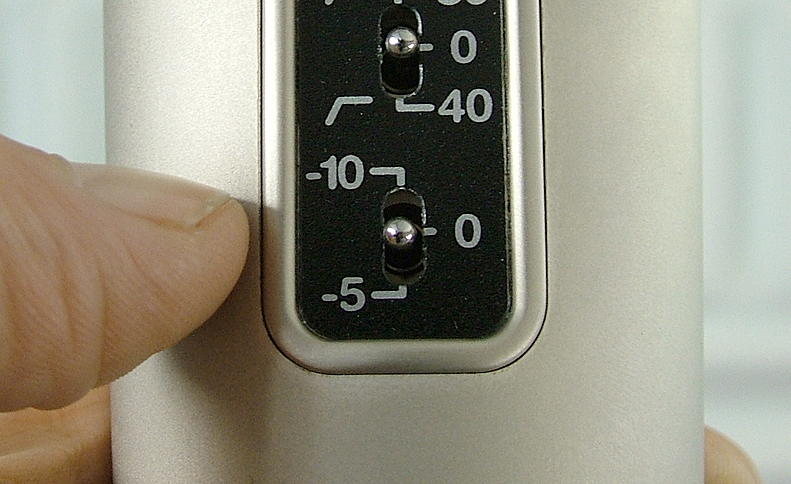
For particularly loud signals, the sensitivity of a microphone can be reduced with the help of a so-called pad switch to avoid overdriving the built-in preamplifier. Values between -5 dB and -20 dB are common here. The pad function should be activated when miking drum sets or guitar amps; you can deactivate it for vocal recordings.
5 High-pass filter
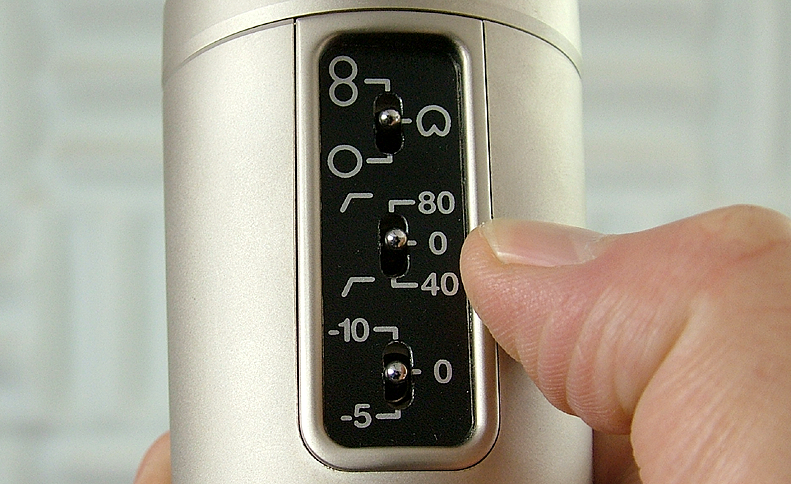
Most studio microphones have a built-in high-pass filter to filter out muffled background noise such as footsteps before recording. It usually kicks in with a slope of 6 dB/octave below the lowest frequency of the human voice, which is around 80 Hz. When miking acoustic instruments, the filter should be set to 40 Hz or left off.
6 Recording direction

The direction from which the microphone has the highest sensitivity is called the zero-degree pickup direction. It is usually indicated by a mark on the microphone or the manufacturer's logo. When recording, this side of the microphone must face the instrument or the singer. Any deviation from the ideal position will result in clearly audible sound coloration.
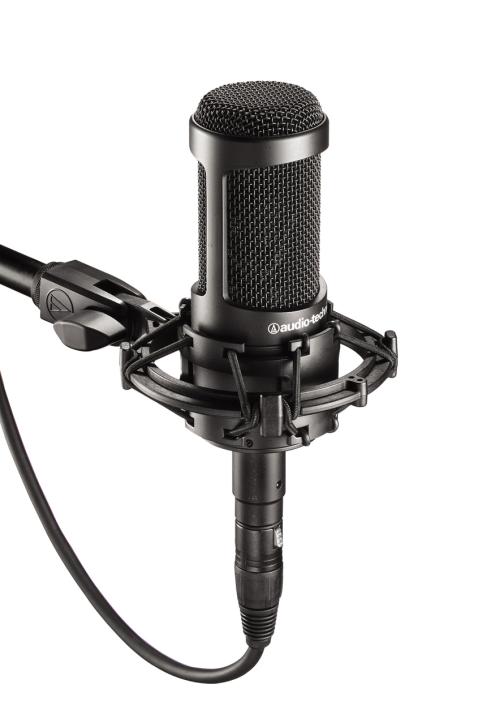
7 Spider
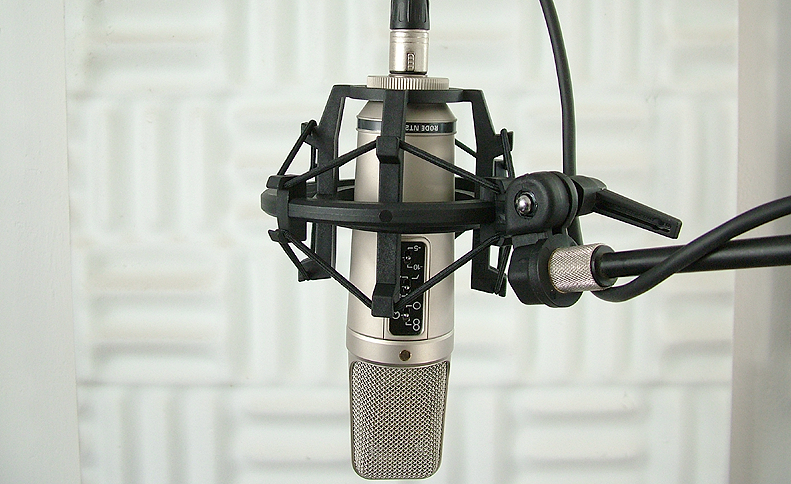
The purpose of the spider is to acoustically decouple the microphone from its connection to the stand and the studio floor. The microphone is suspended freely with the help of rubber bands and thus decoupled from impact sound and vibrations. In any case, a spider should be preferred to the clip holder usually supplied with the microphone and purchased separately if necessary.
8 Popping protection
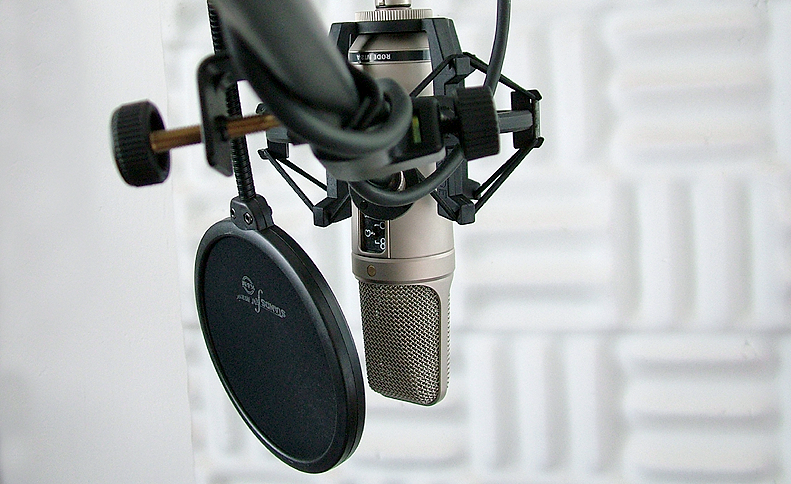
The pop shield prevents excessive S and plosive sounds during recording. It is mounted at least five centimeters away from the center of the microphone capsule. If the singer tends to position himself too close to the microphone, you can also use the pop shield as a spacer to ensure a certain minimum distance between the artist and the microphone.
9 positioning
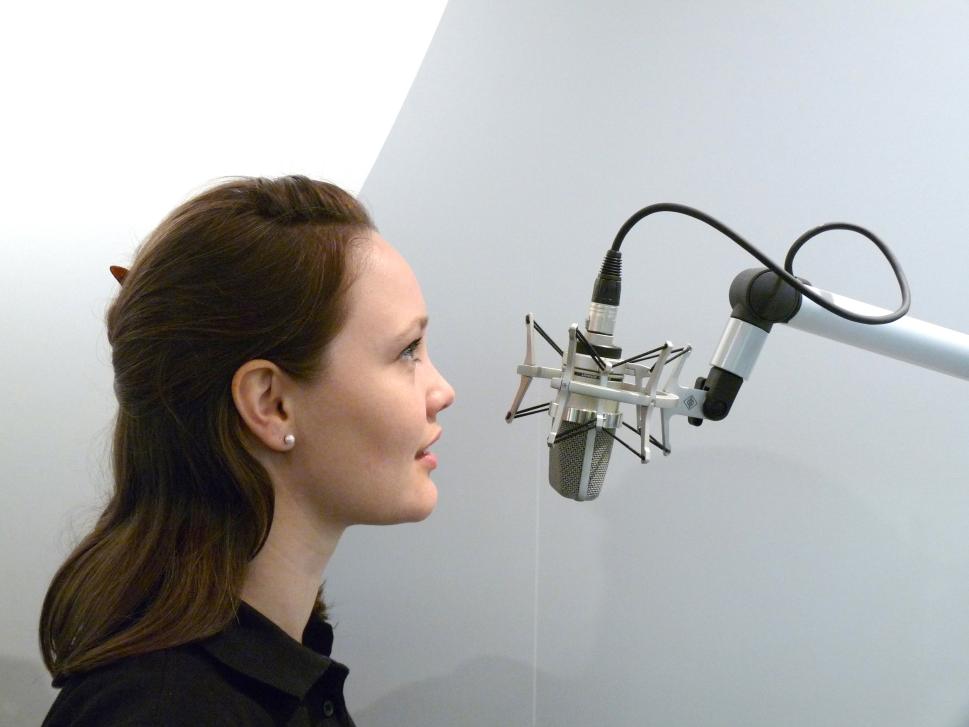
If possible, you should suspend the microphone, i.e. point it at the singer from above using a large tripod, so that it can unfold more freely. The capsule should point at the upper lip at a slight angle so that the upper jaw acts as a barrier and sibilants do not hit the microphone directly. The singer should sing straight forward, never frontally into the capsule.
Want more? Get more!


Subscribe to the digital edition of BEAT Magazine via Plugins-Samples.com and get more gear, in-depth workshops, reviews and 11 GB exclusive plugins and new sounds with every monthly issue!
Subscribe to Beat Magazine for only 4.99€ per month