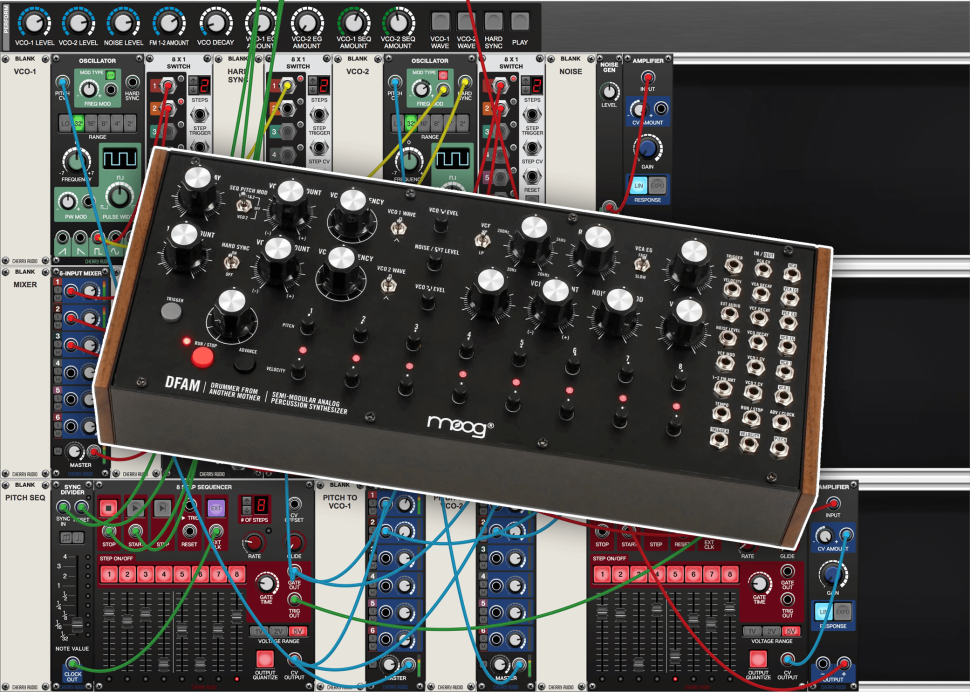
DIY: A Moog DFAM for everyone? Easy replicated with Voltage Modular
1 Percussion
Synth Contrary to its name, „Drummer From Another Mother“ is not a pure drum synth, but focuses on percussion and bass sequences. With its two oscillators and the noise module combined with jagged envelopes and two eight-step sequencers, both rhythmic and melodic sequencers can easily be conjured up.
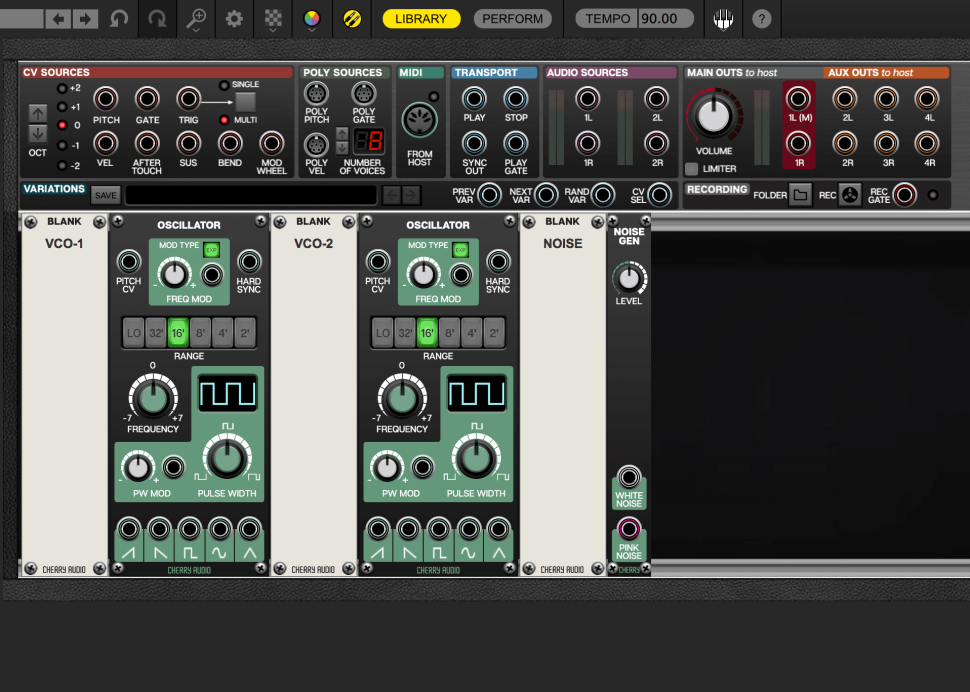
2 Oscillators & Noise
That can be copied on the computer, right? Absolutely! We use Voltage Modular from Cherry Audio (see booklet software) and load the oscillator module and the noise generator twice at the beginning. For a better overview with later wiring, we also add several blank panels which we then label appropriately.
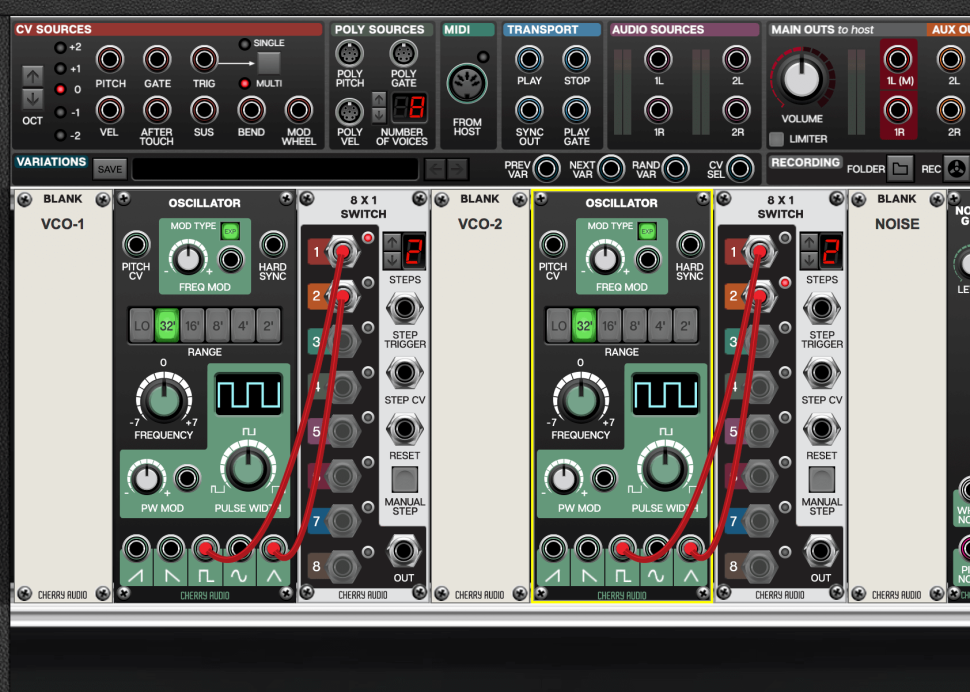
3 Two Waveforms
Since the DFAM only offers Square and Triangle waveforms, we need an Eight-toOne switch for each oscillator. Reduce the STEPS to 2 each and connect the two waveform outputs to the inputs of the switches. That way, you can switch the waveforms at the touch of a button on MANUAL STEP. By the way, we color all our audio cables red.
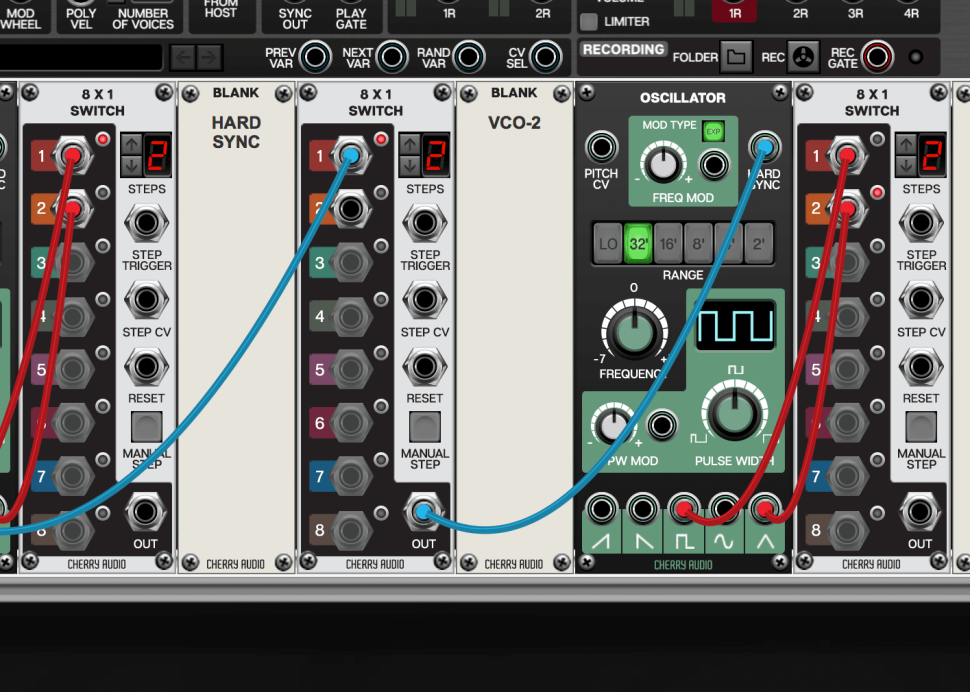
4 Hard Sync
To synchronize the oscillators, we load another switch with a blank panel. Again, we reduce the STEPS to 2, but connect only the first input to the square-out of VCO-1. Be sure to run the cable from the switch input to the square-out or pull out the existing cable
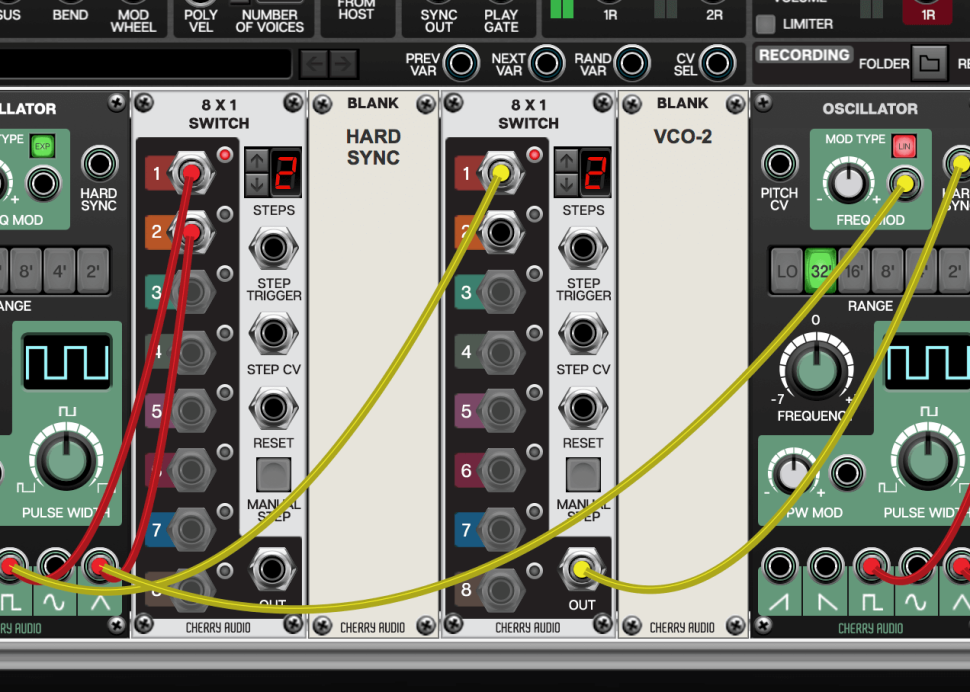
5 Frequency Modulation
We route the switch-out to the HARD-SYNC input of VCO-2 and, because these are audio modulators, we color the cables yellow. Since the DFAM‘s VCO-1 can FM modulate the second oscillator, we connect the FREQ MOD input of VCO-2 to the Triangle Out of VCO-1 and press the EXP switch to switch to LIN(ear)
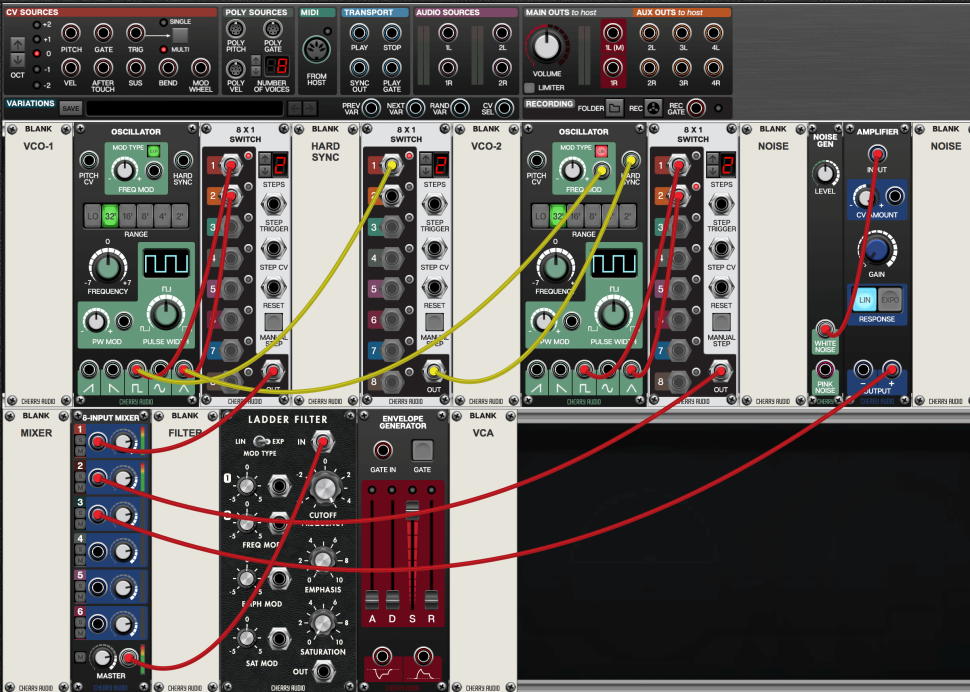
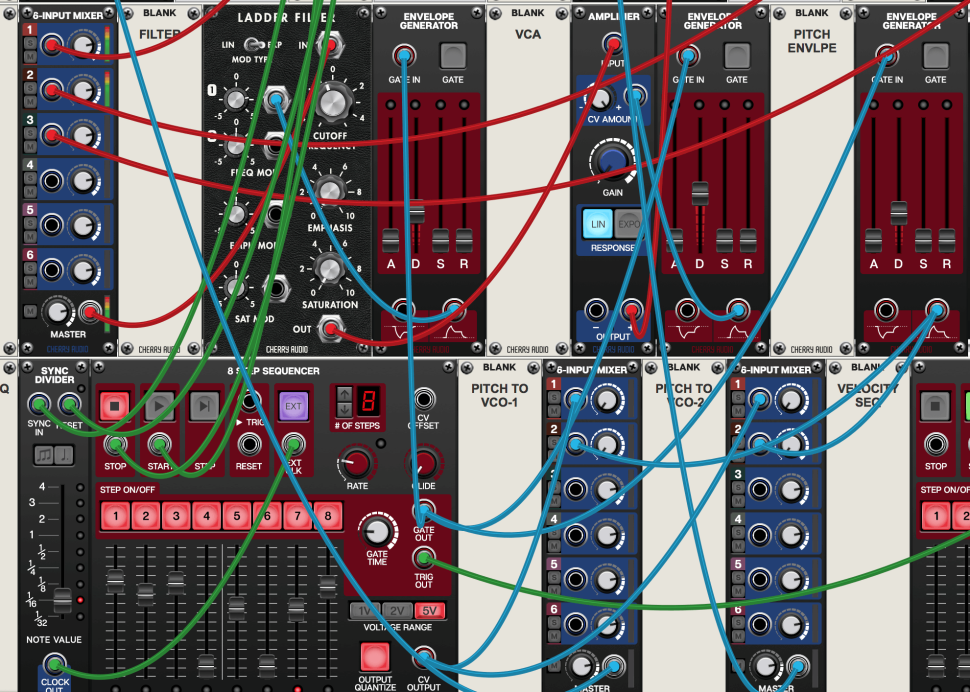
6 Mixer & Filter
Now extend the Noise module with an AMPLIFIER and lead the WHITE-NOISE output to its INPUT. Then we load a 6-INPUTMIXER and route the outputs of the switches and the amp to the first three inputs. The output of the mixer is then routed to a filter. The LADDERFILTER module comes in handy here, both sonically and visually.
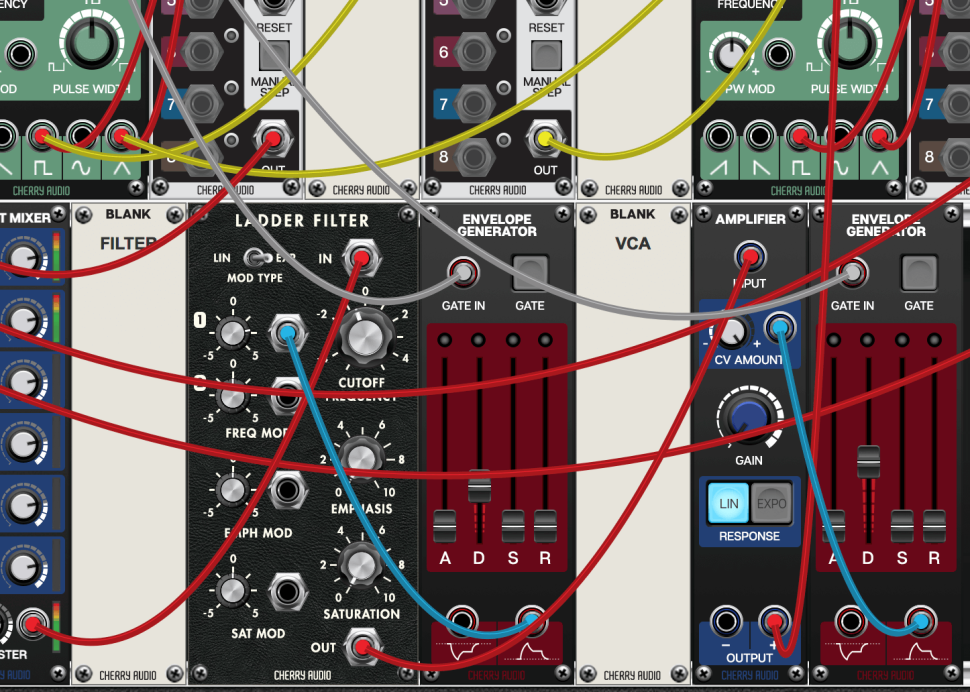
7 Envelopes
For sound generation, only envelopes for filter and volume and an amp are missing. Let’s add these three, as well as a blank panel for the VCA. The filter output ends up in the AMPLIFIER, while the respective positive envelope outputs are routed to the CV inputs of filter and amp. The Amp Output leads to the MAIN OUT of Voltage Modular.
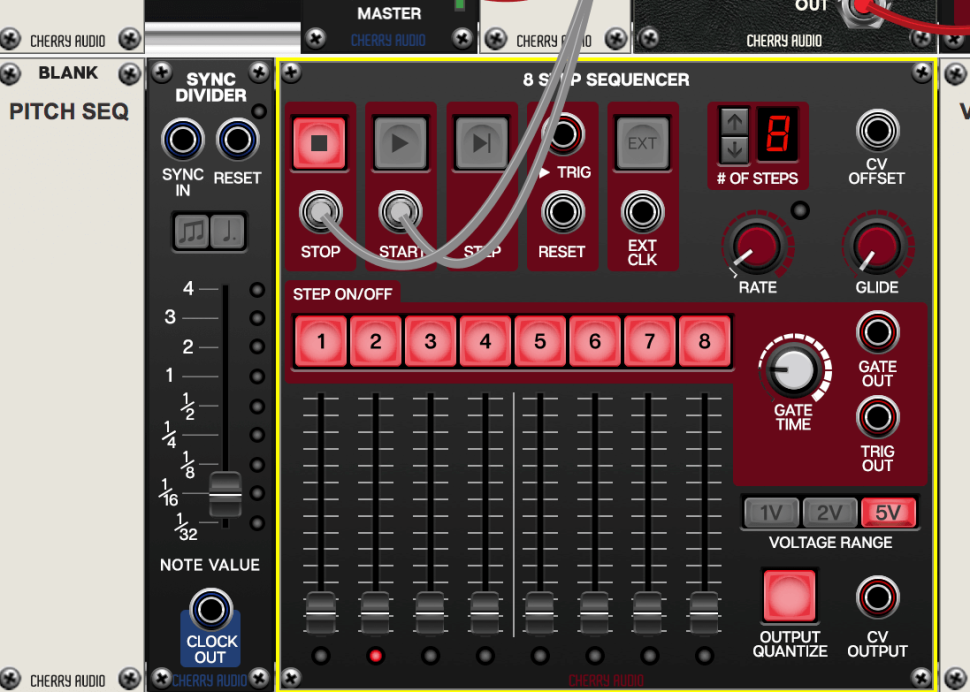
8 Sequencer
Let‘s get to the heart of the DFAM: the sequencers. The 8-STEP-SEQUENCER module comes in handy here. Load it twice with blank panels that we’ll call „Pitch Seq“ and „Velocity Seq“. If you are using the program as a plug-in, connect PLAY and STOP in TRANSPORT above to PLAY and STOP of the first sequencer. Load a SYNC-DIVIDER module.
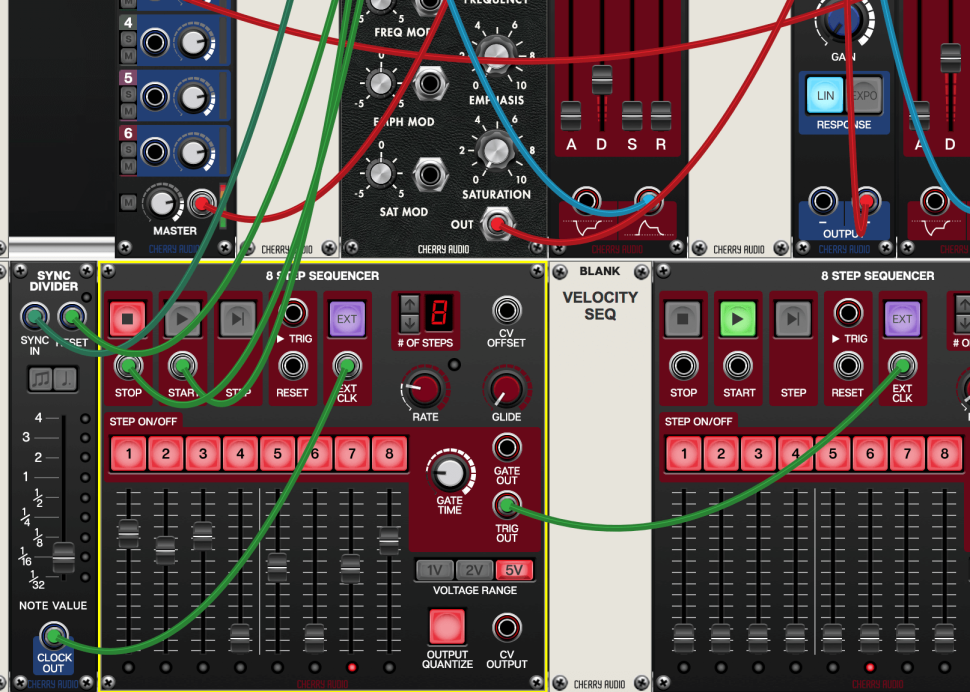
9 Clock Signal
This takes care of converting the BPM information of the standalone app or your DAW into a clock signal. To do this, connect SYNC OUT and PLAY GATE under TRANSPORT with SYNC IN and RESET of the module. The CLOCK OUT runs to the EXT-CLK input of the first sequencer. Activate the EXT button. Now the sequencer runs in sync with your DAW.
10 Gate Trigger
To make sure that the second sequencer runs smoothly, we send the TRIG OUT of the first one to the EXT-CLK input of the second one and activate EXT here as well. The GATE OUT of the first one is connected to the GATE IN‘s of both envelopes. Load a third one and connect it too, because this one will modulate the pitch of the oscillators.

11 Sequencer
In order for the sequencers to make a difference, we have to connect them to parameters. The pitch sequencer affects the oscillators in the DFAM with individual intensity, so we load two 6-INPUT MIXERS and route the CV output of the sequencer into both. We also add another ENVELOPE GENERATOR, which also modulates the pitch.
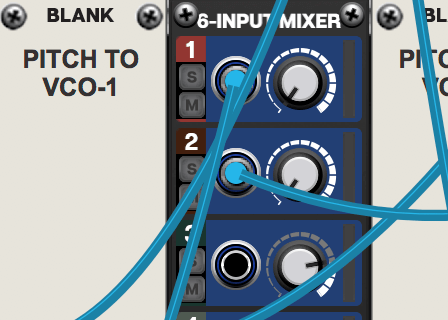
12 Individual Pitch
Route its positive CV Out to the second input of each of the two new mixers. This allows you to individually control the intensities of the sequencer and pitch envelope per oscillator. The only thing missing is the velocity sequencer: Next to it, we load another amp, connect CV OUTPUT to the mod input of the amp and turn CV AMOUNT up to full power.
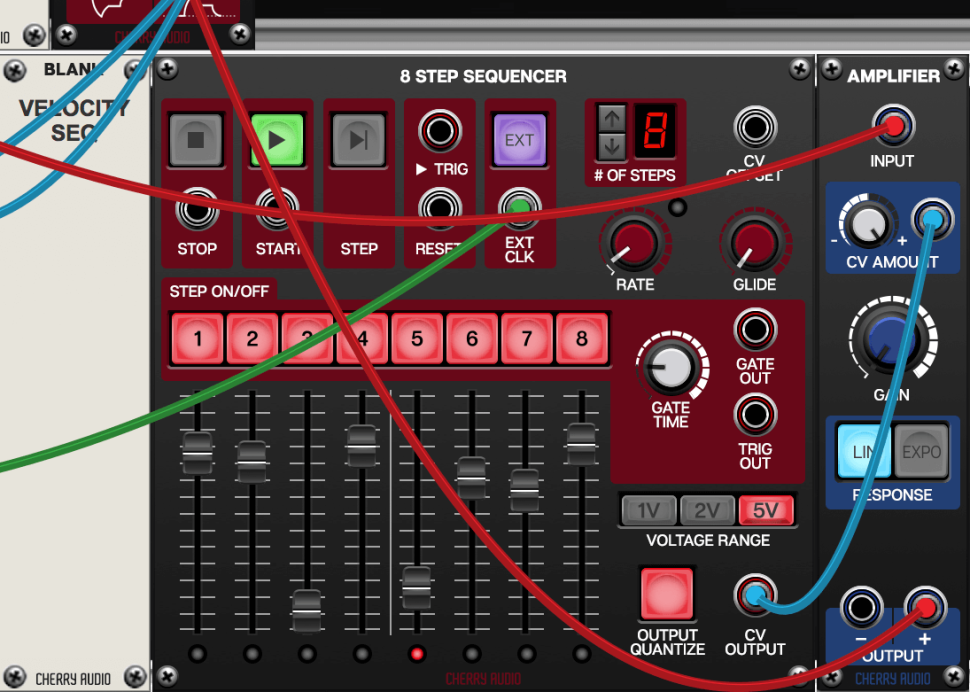
13 Ready!
Into the INPUT we route the audio cable from the amp that follows the filter (which currently still leads to the MAIN OUT). The OUTPUT of the new amp is routed to the MAIN OUT. That‘s it! In order to not lose track of all the modules and parameters, we use the PERFORM button to display the macro controls at the top.
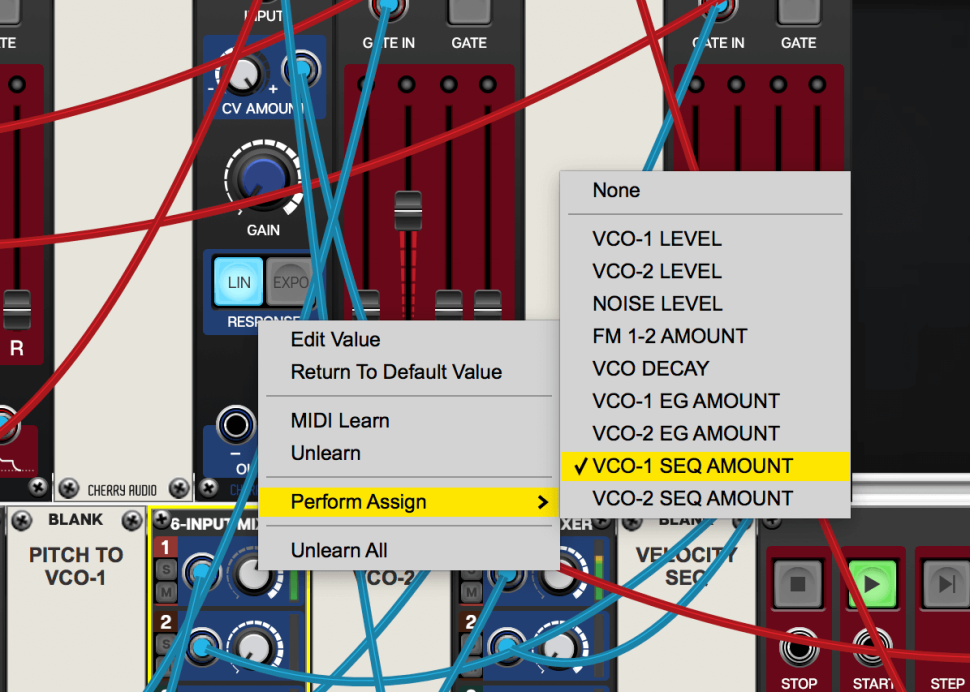
14 Live Performance
This allows us to assign any parameters to nine knobs and four buttons and „abbreviate“ them. Like DFAM, the volume of the oscillators and noise, as well as FM Amount, decay of the pitch envelope and the four controls of the input mixers (which take care of the pitch modulation), have proven themselves. To do this, right-click on the desired control.
15 More Moog Knobs
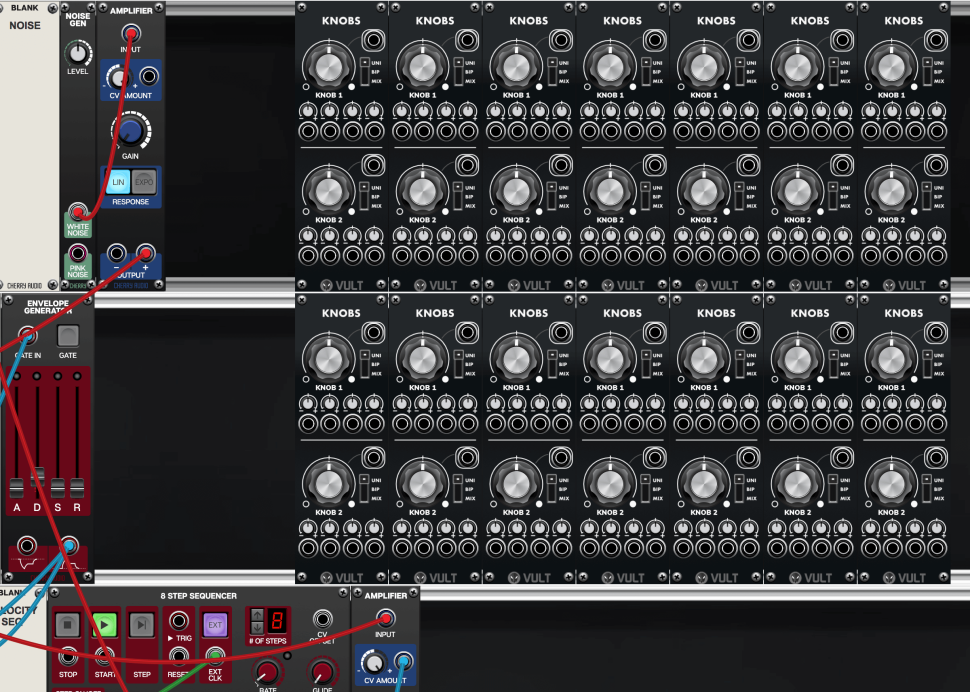
In the popup that now appears, you can use the „Perform Assign“ option to assign the parameter to one of the macro controls. By the way, if you want more of the original look, load the free Vult-Knobs module into the rack several times. The typical Moog knobs work similarly to macros and look very sexy. Have fun drumming!
More workshops?
In addition to our fixed series for Cubase, Logic, Ableton Live, Maschine, MPC and FL Studio, each beat issue contains page after page of useful workshops and tricks for producing, jamming, mixing, mastering, arranging and many other topics. So subscribe to Beat and don't miss any more tips.
Want more? Get more!


Subscribe to the digital edition of BEAT Magazine via Plugins-Samples.com and get more gear, in-depth workshops, reviews and 11 GB exclusive plugins and new sounds with every monthly issue!
Subscribe to Beat Magazine for only 4.99€ per month