Power Producer: Ableton Live - Compressing vocals properly
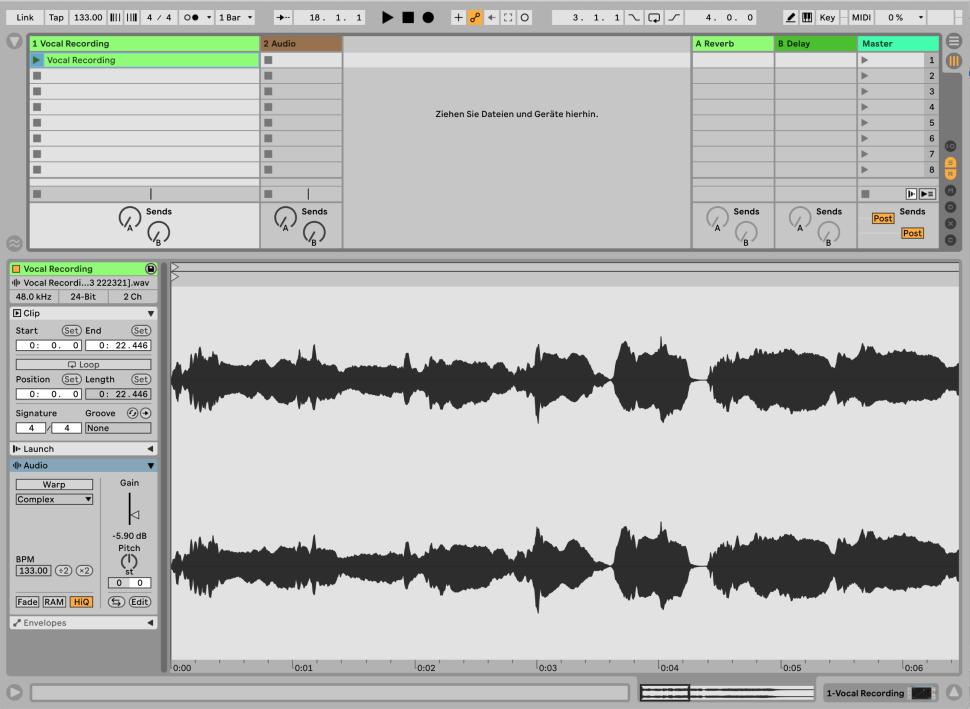
1 Control dynamics
If the differences in volume are particularly strong, some vocals will be lost in the mix, while others will be too prominent. Use the compressor to achieve more consistency. Therefore, load a compressor into the vocal track in question and set the threshold to -24 dB.
2 Set parameters
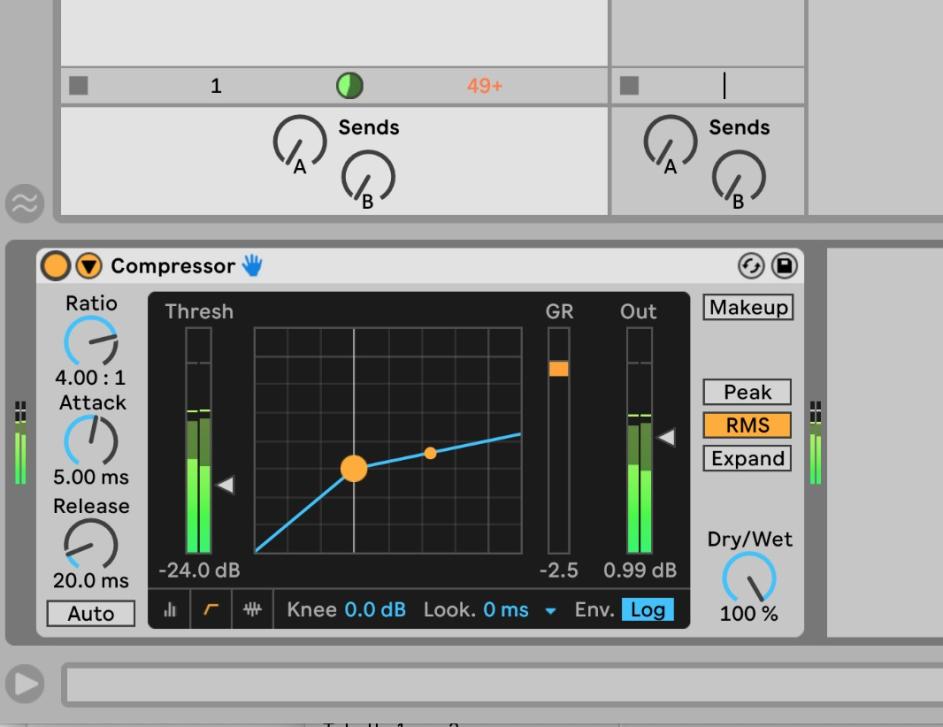
Wählen Sie ein Verhältnis von 3:1 und je nach Stimmcharakteristik eine schnelle bis mittlere Attack-Zeit von ca. 5 ms und eine mittlere Release-Zeit von ca. 20 ms. Für eine knieharte Charakteristik stellen Sie Knee auf 0 dB. Erhöhen Sie nun den Output so, dass die Lautstärke bei ein- und ausgeschaltetem Kompressor gleich bleibt.
3 Contain plosives
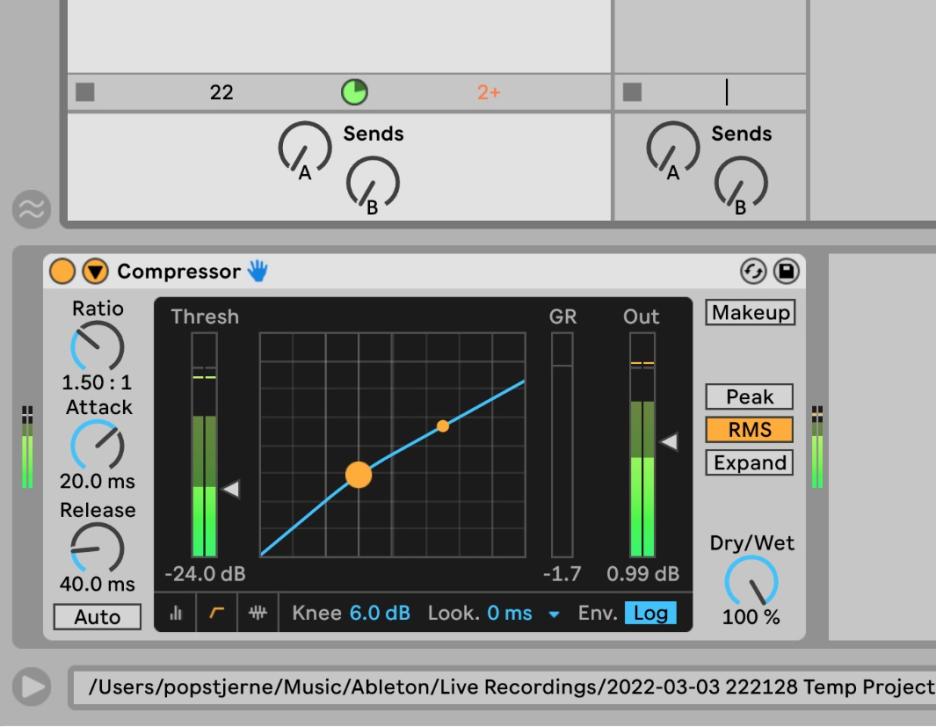
Excessively pronounced popping sounds that occur in connection with the letters p, b, d and t can also be controlled with the compressor. Choose a ratio of 1.5:1, a fast attack time of 10 ms aimed at the steeper transients, and an average release time of 40 ms. Leave the threshold at about -24 dB.
4 Mehr Schärfe
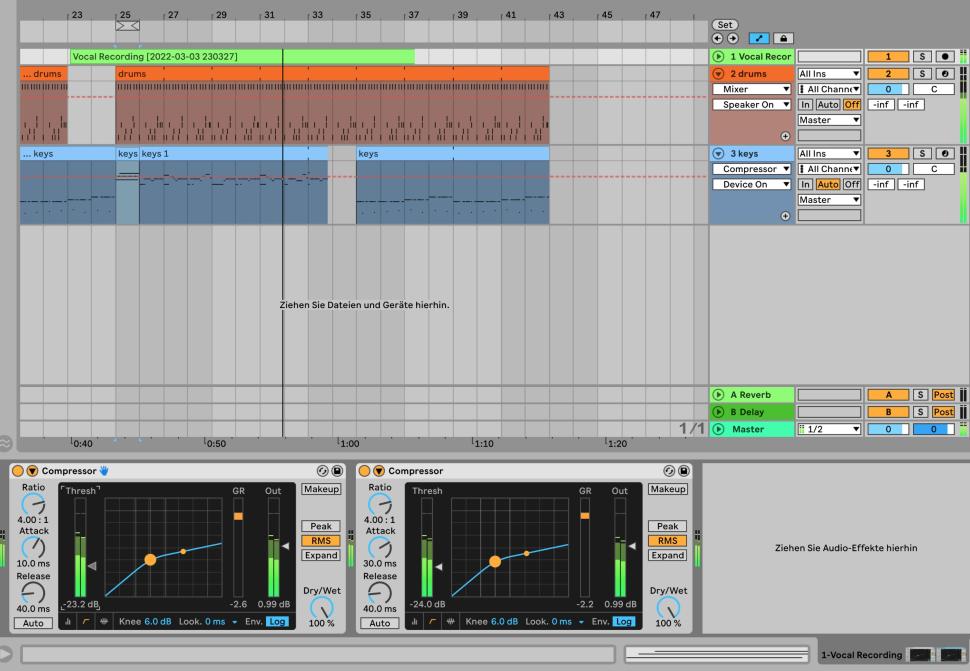
Select a soft knee characteristic. If your vocals need more bite, keep the settings you made earlier and only increase the attack time to 30 ms. If you are compressing vocals very heavily, for example with a ratio of 6:1, two compressors in succession, each with a ratio of 3:1, often sound more musical than one.
5 Automation
Especially if only a few vocal parts require processing with a compressor, use automation curves instead to activate the compressor selectively. Sometimes, however, volume automation of the "too dynamic" parts leads to sonically better results than compressing the entire track.
6 Create space for vocals

If you have instruments in the mix that overlay your vocals, make room by placing a compressor on the instrument. Enable Sidechain and select the vocal track under Audio From to control the compressor. Set a medium ratio and threshold, choose a short attack, and set Release to Auto.
Want more? Get more!


Subscribe to the digital edition of BEAT Magazine via Plugins-Samples.com and get more gear, in-depth workshops, reviews and 11 GB exclusive plugins and new sounds with every monthly issue!
Subscribe to Beat Magazine for only 4.99€ per month