1 Loop song part
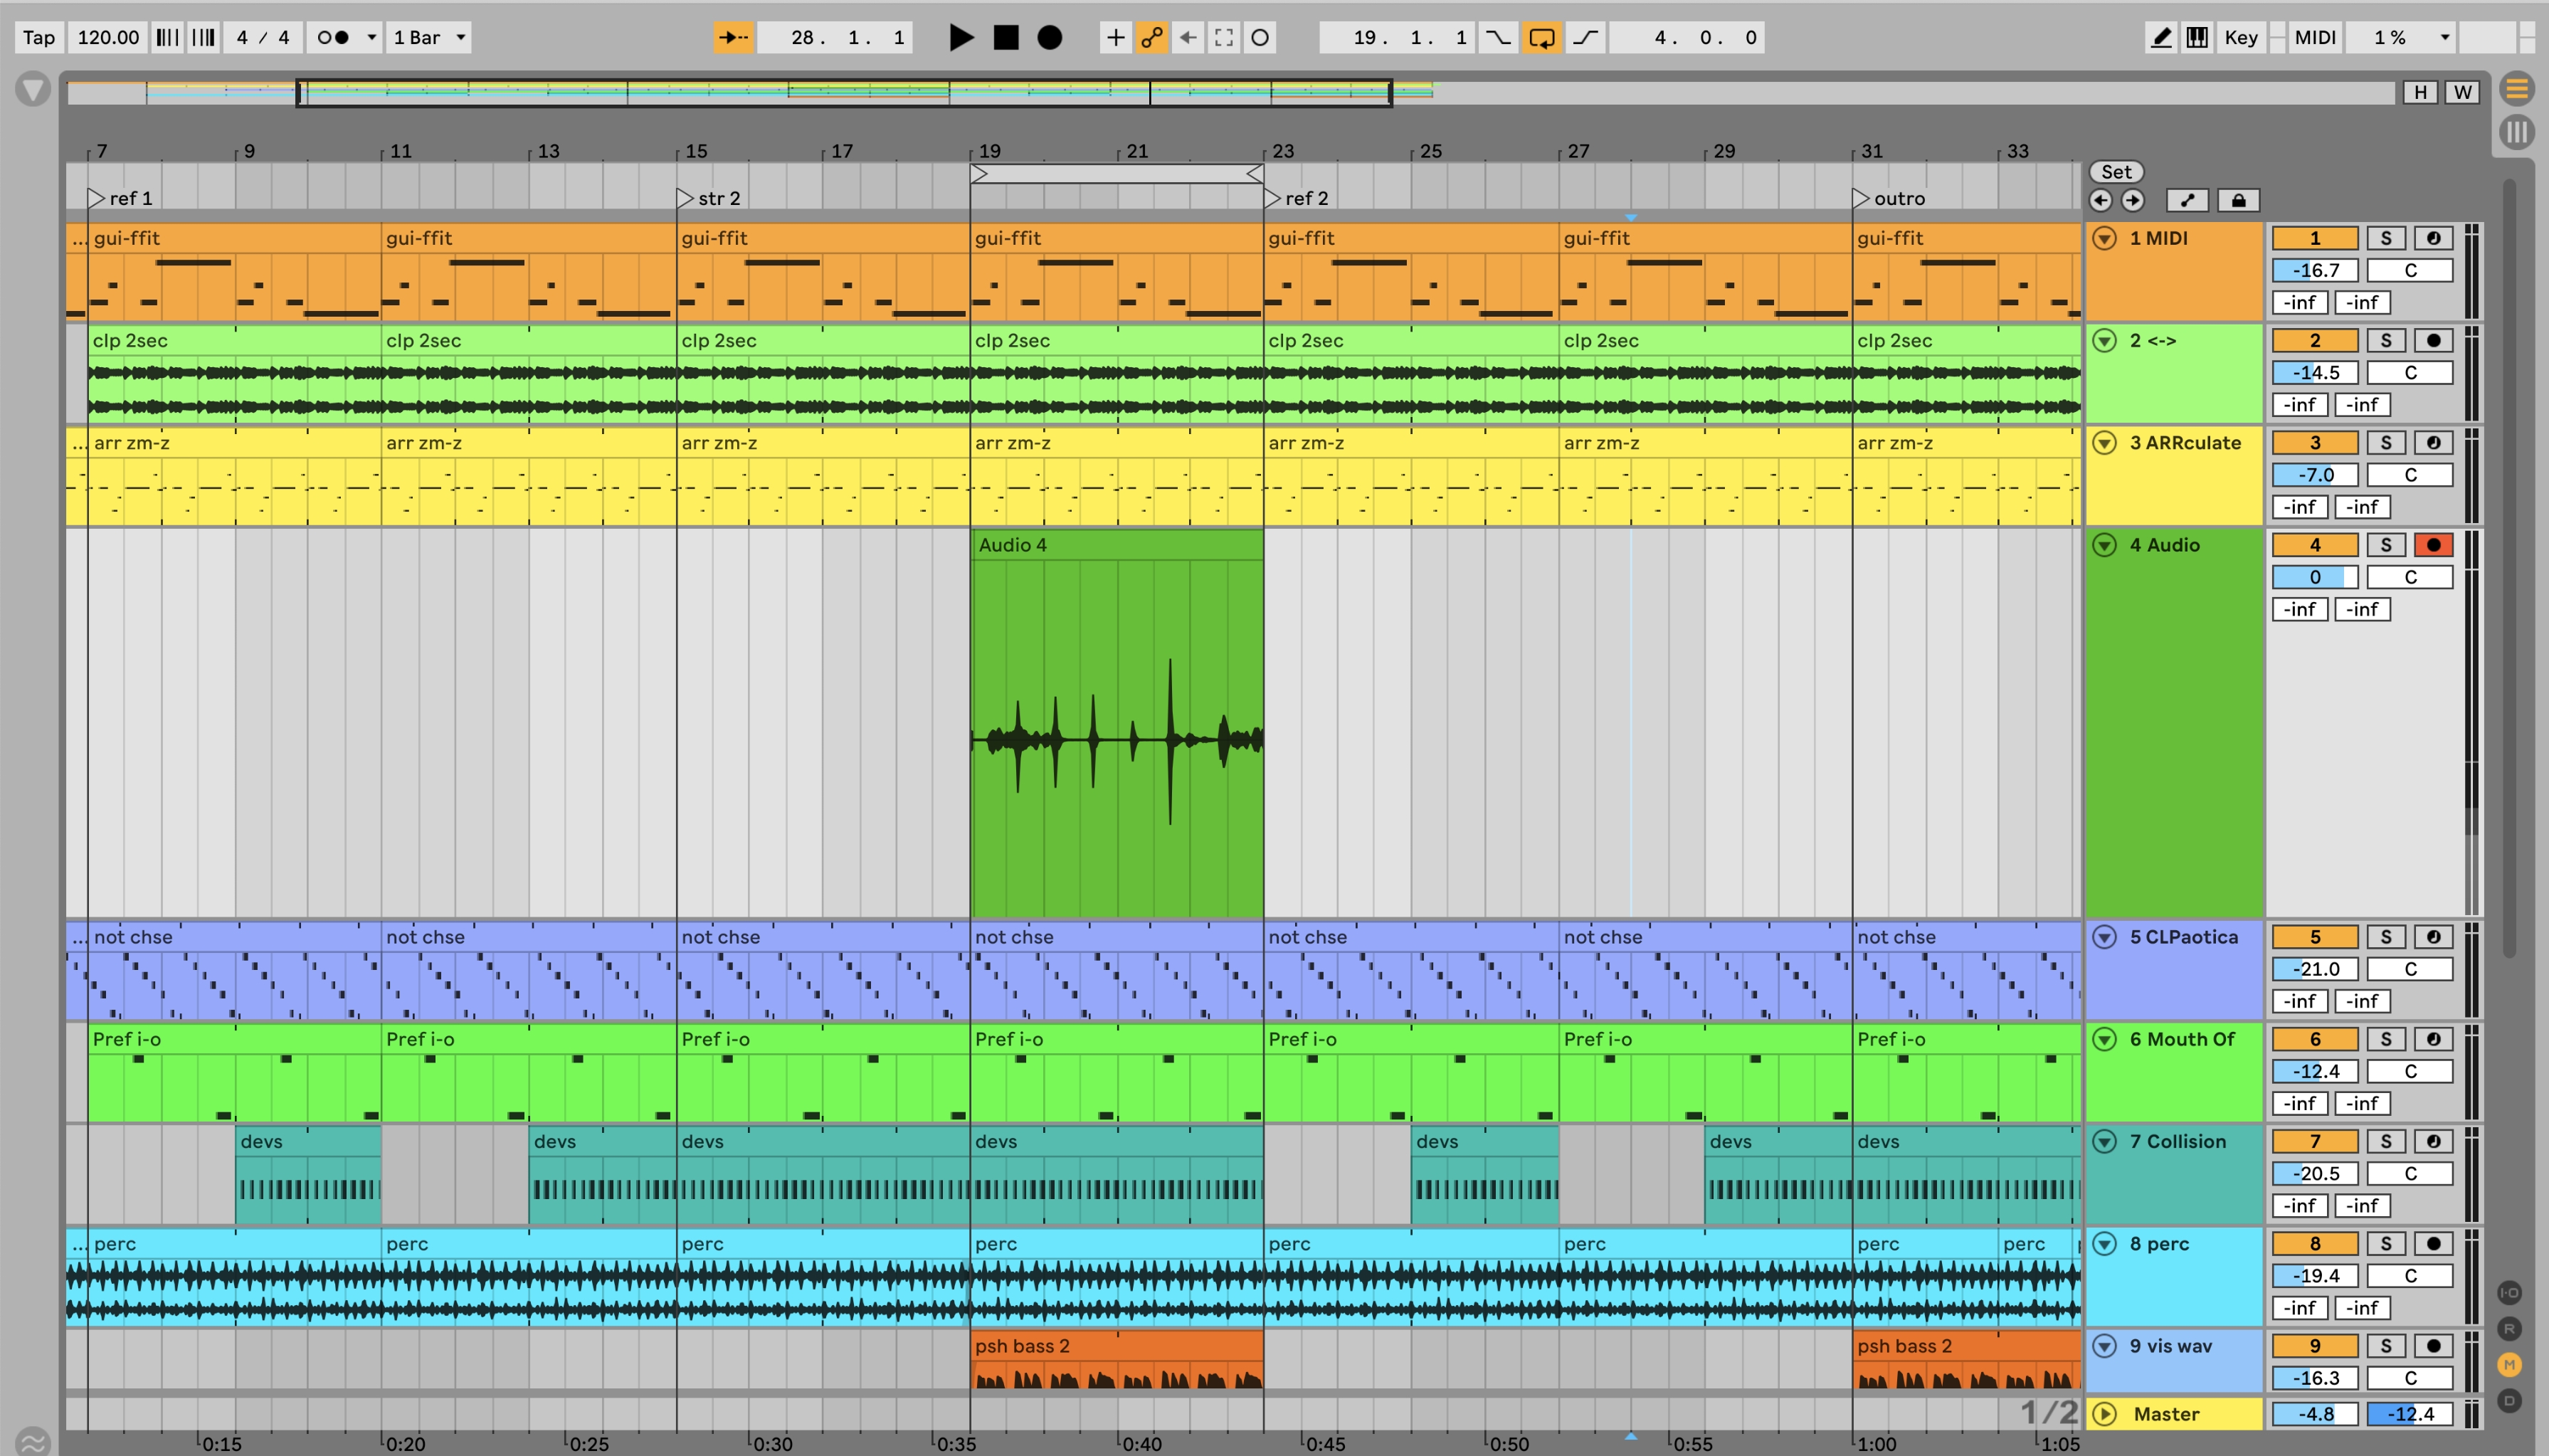
In your arrangement, select a part in which you want to record multiple takes. Place the loop brace over the selected song part and activate the loop function. Arm the audio track and start recording. Play the part several times in succession without stopping the recording.
2 Open take lanes
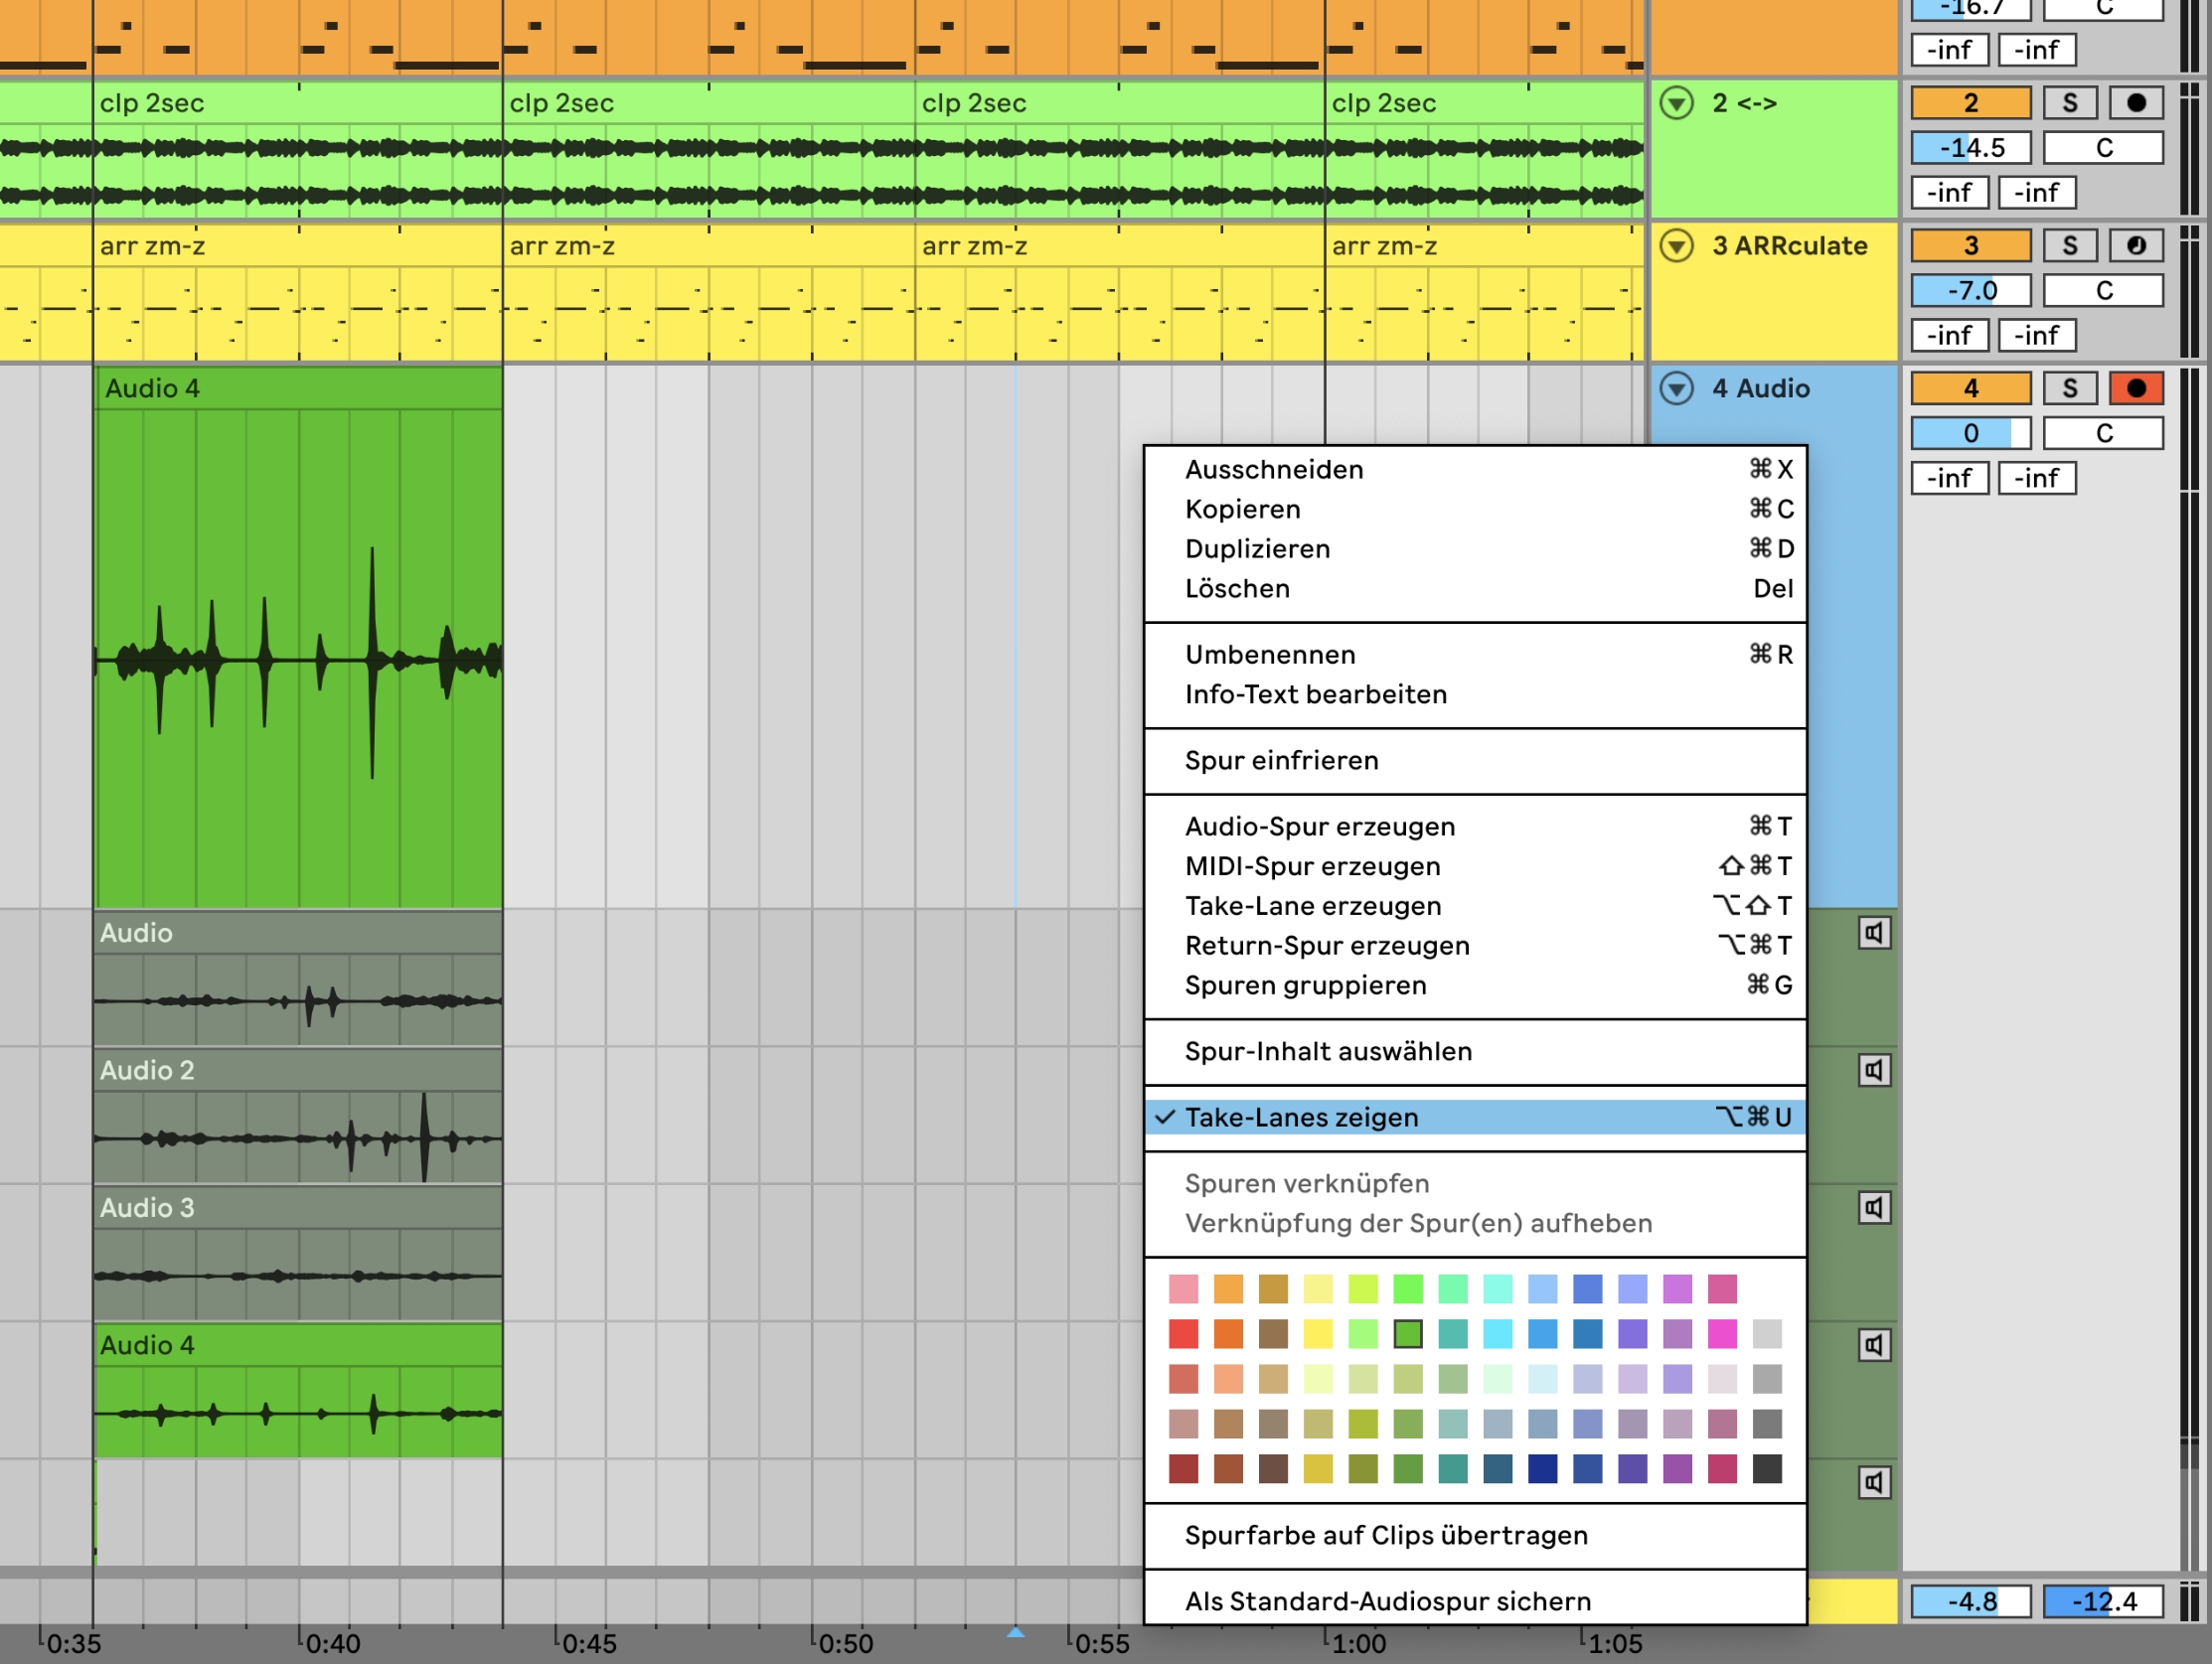
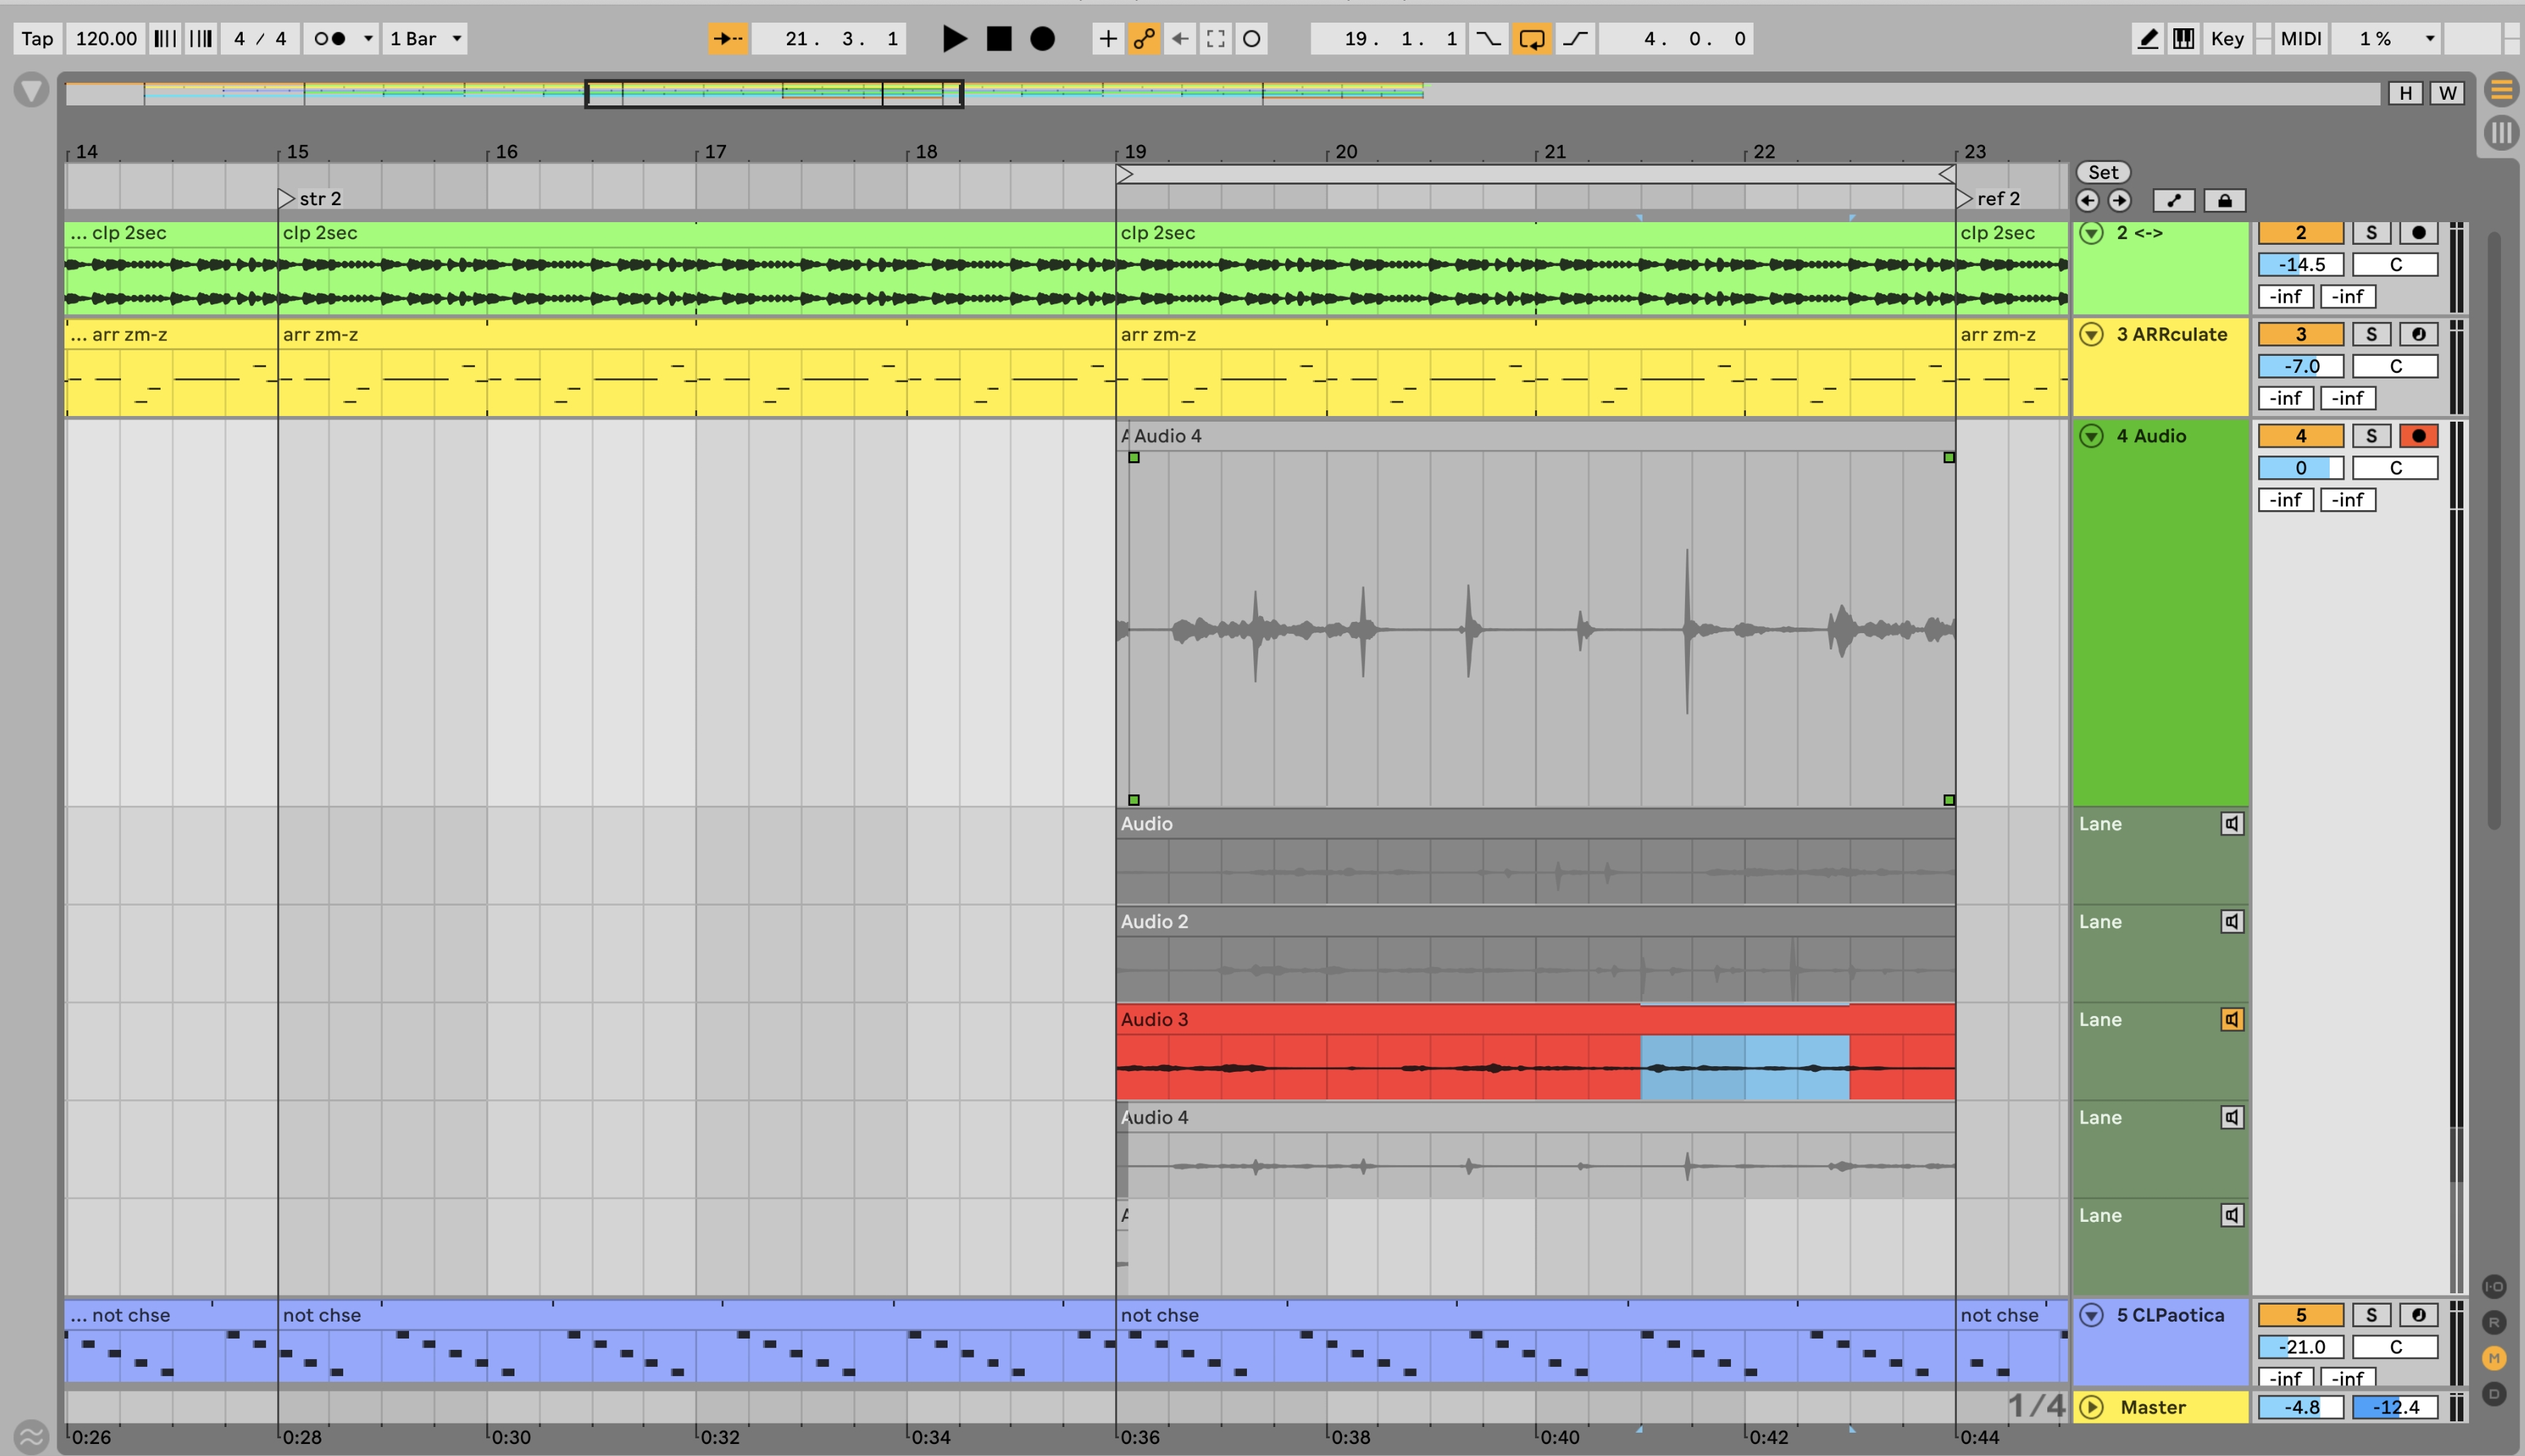
Each time you loop, a new track is automatically created for each take. When you stop recording, you see only the last recorded take. Right-click on the track title bar to open the context menu and select the Show Take Lanes option. Now all loop passes appear in their own track.
3 Listen to take lanes
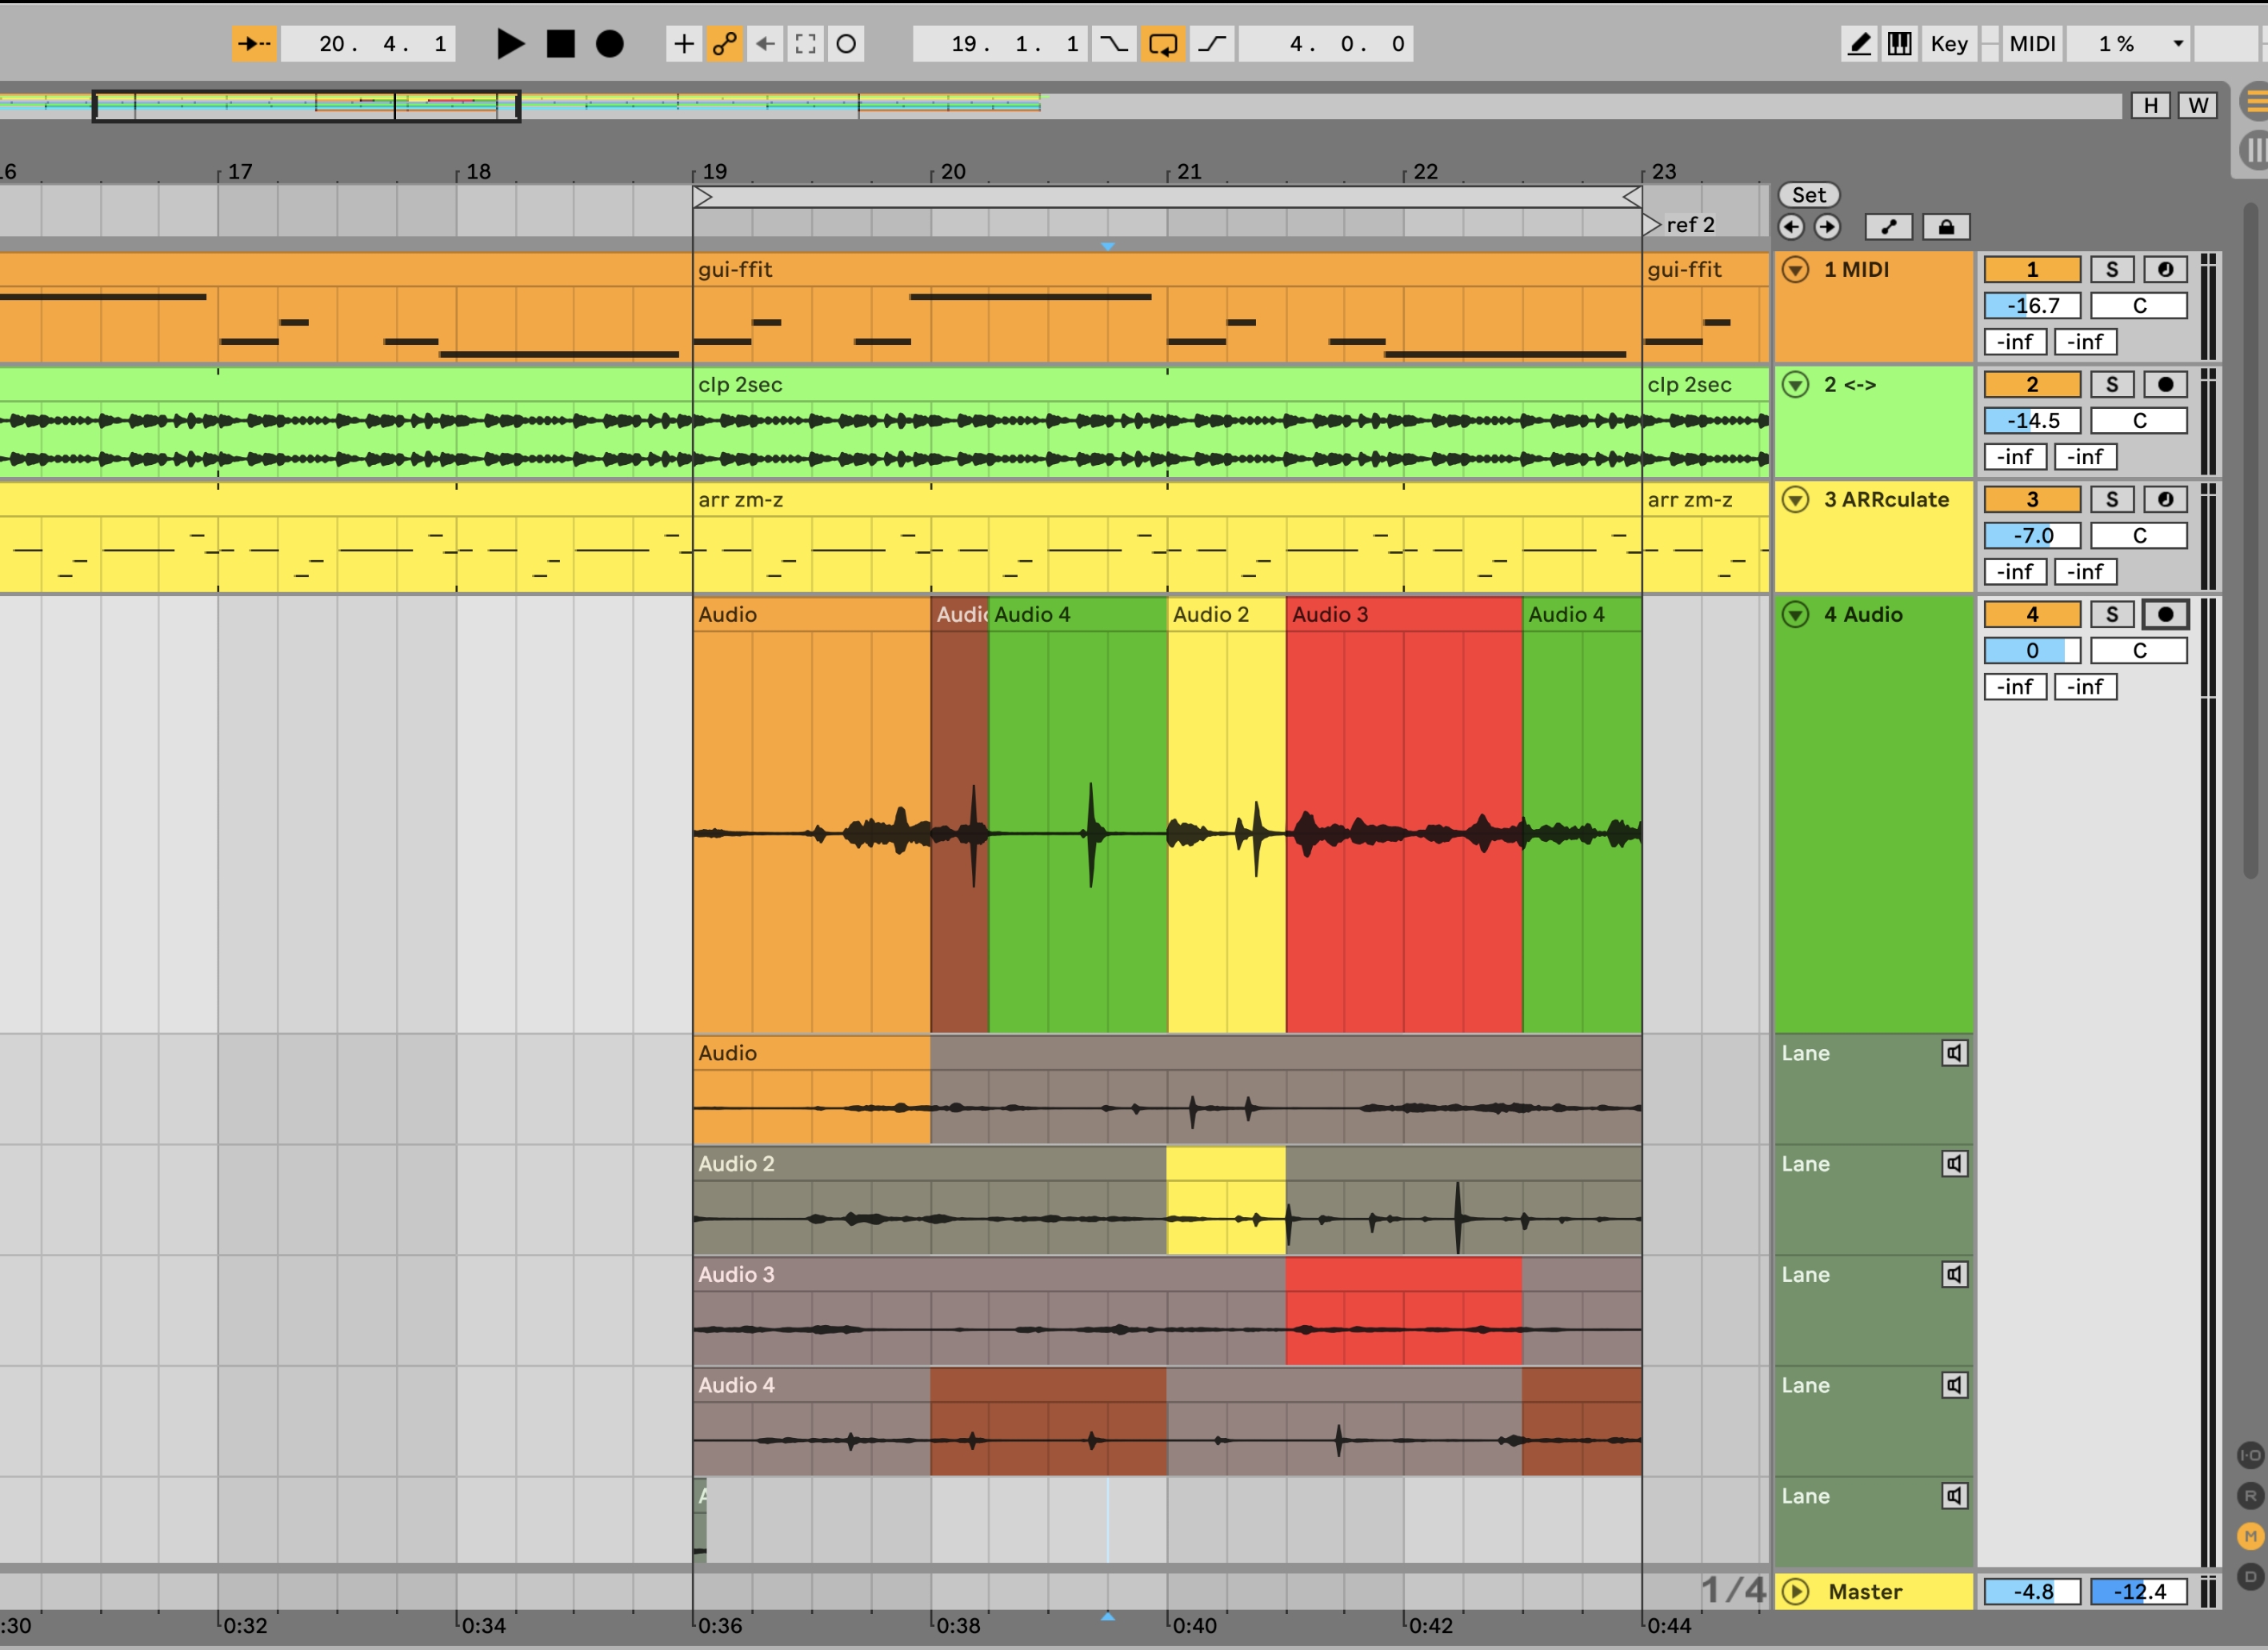
To listen to a take, click the speaker icon in the title bar of the take lane and then start the clip. If you particularly like a part of the take and want to add it to the final take, select the desired part and press the Return key on your computer keyboard.
4 Final takes
The part appears in the original recording track where the final take is created. Listen to all the take lanes, select the best parts, press Enter and you have a perfect take. To hide the take lanes again, go to the context menu and deactivate the function with a click.
5 Take lanes for videos
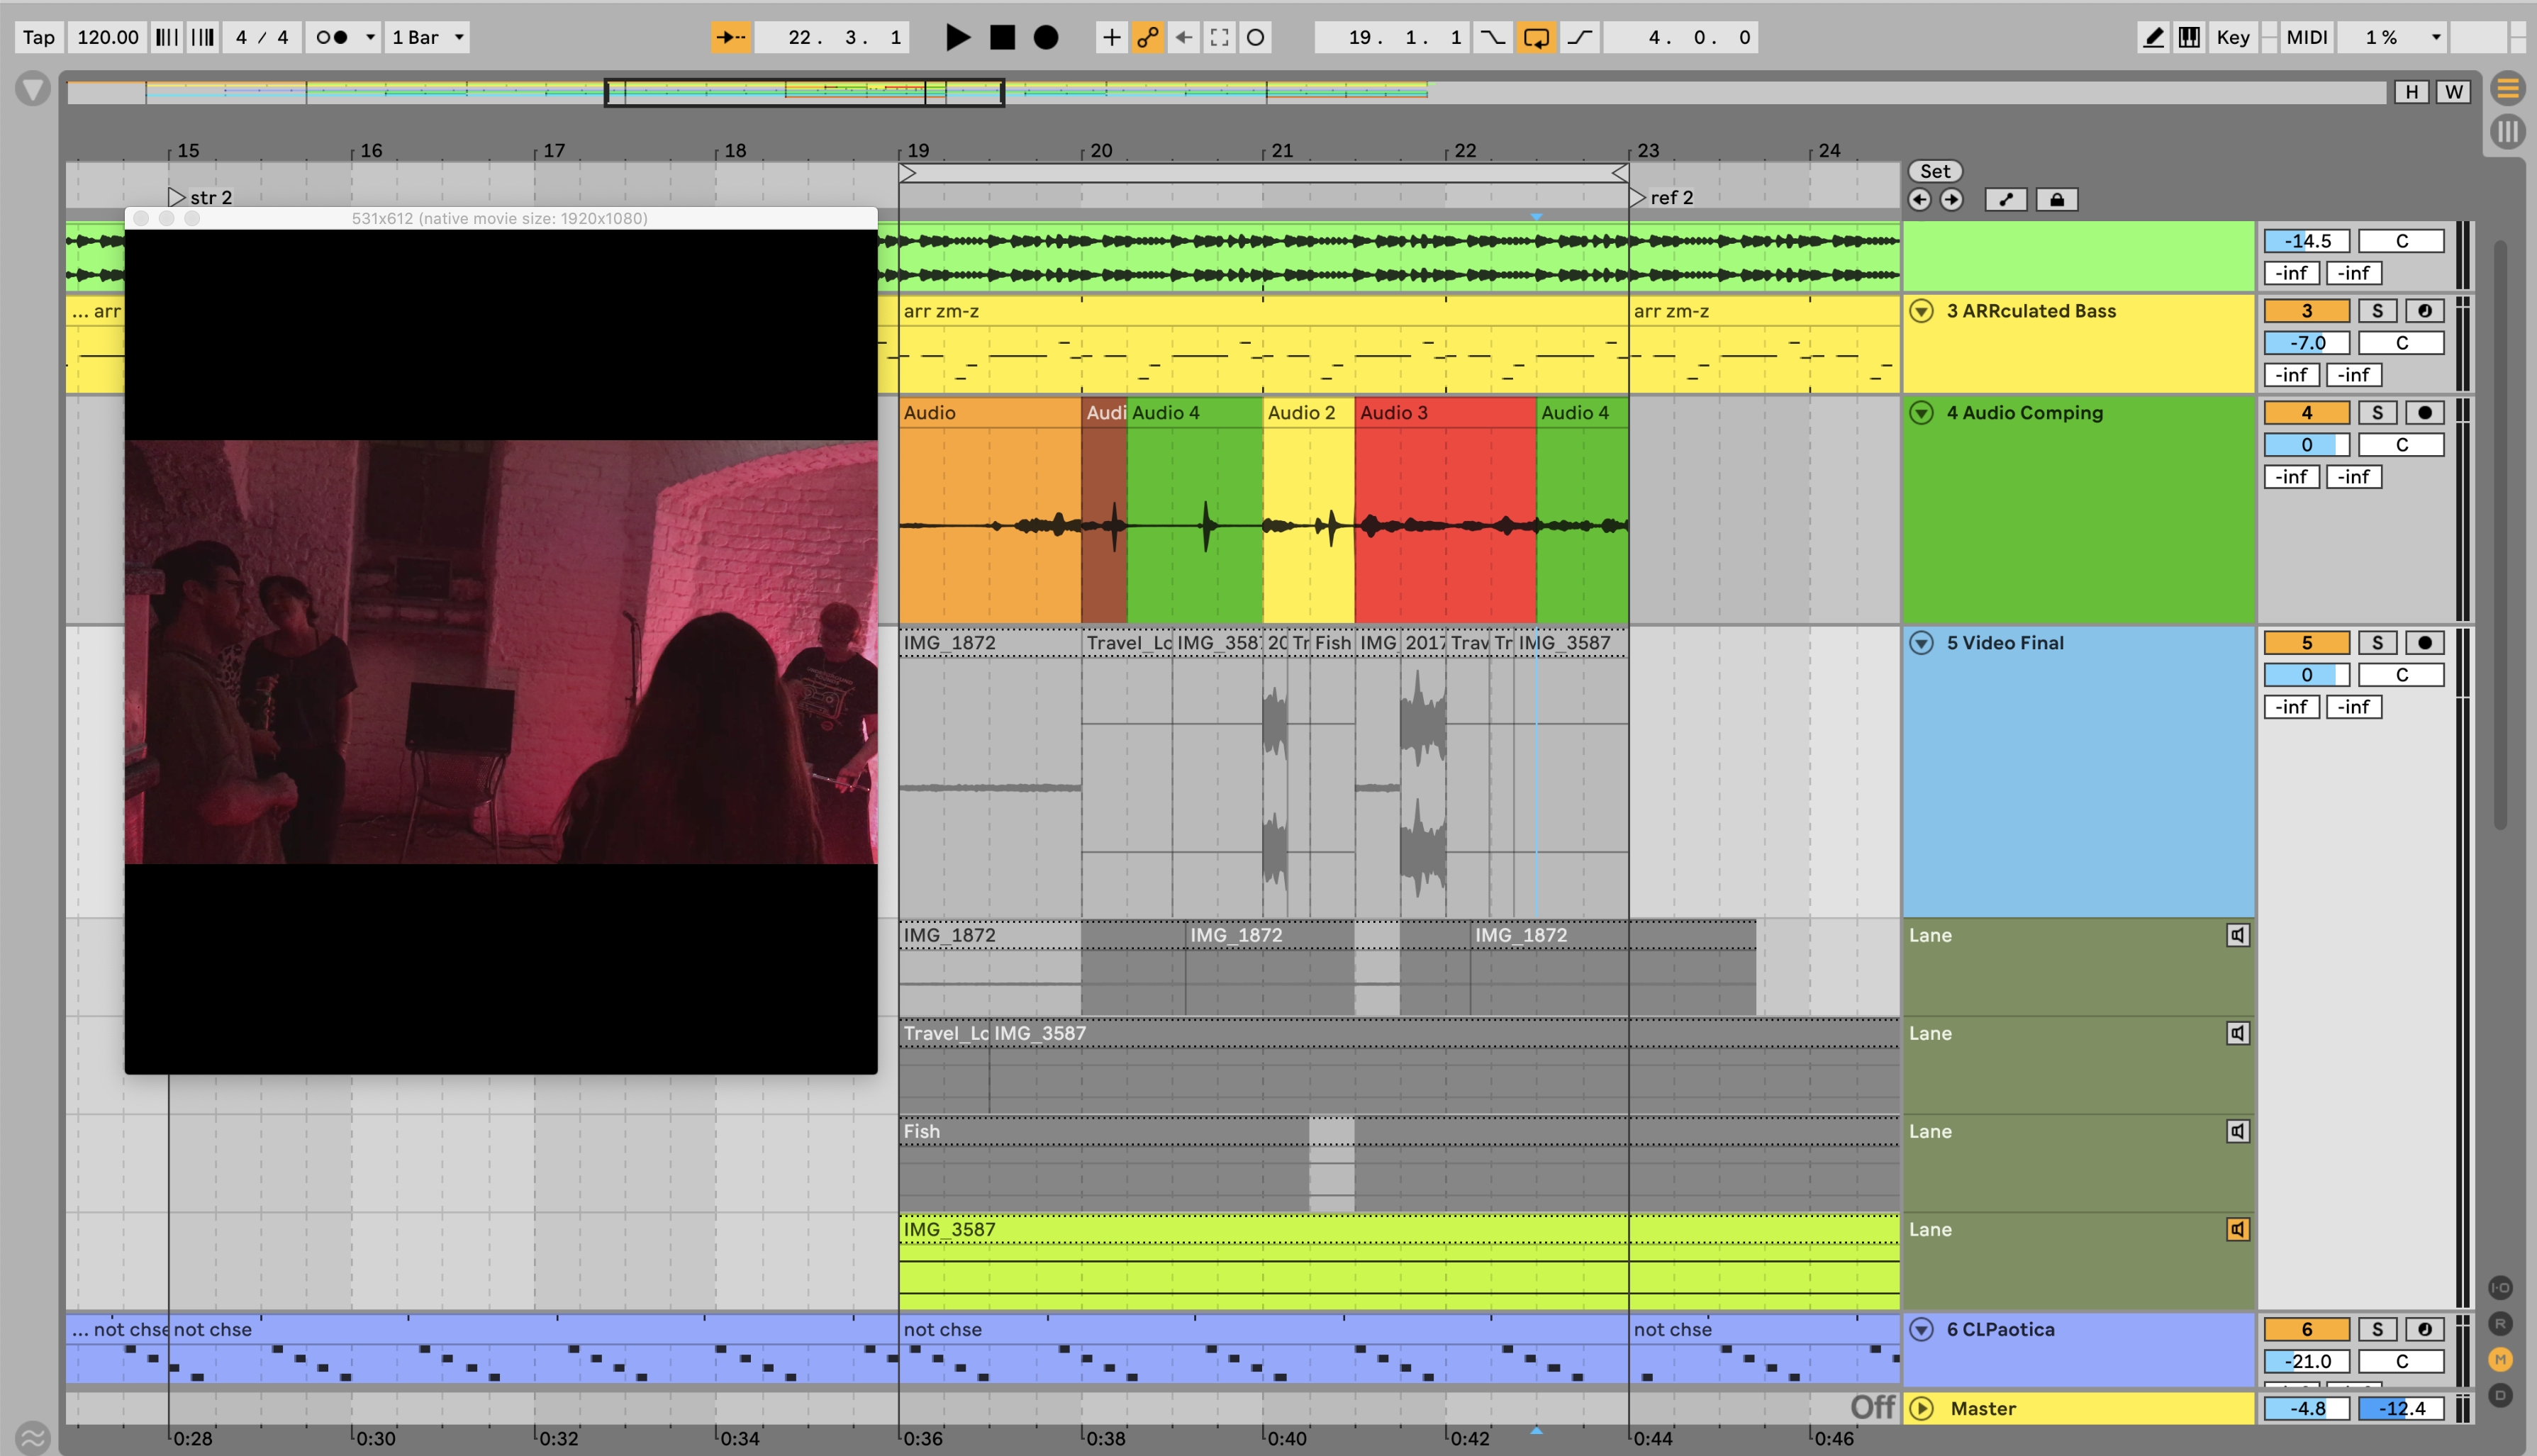
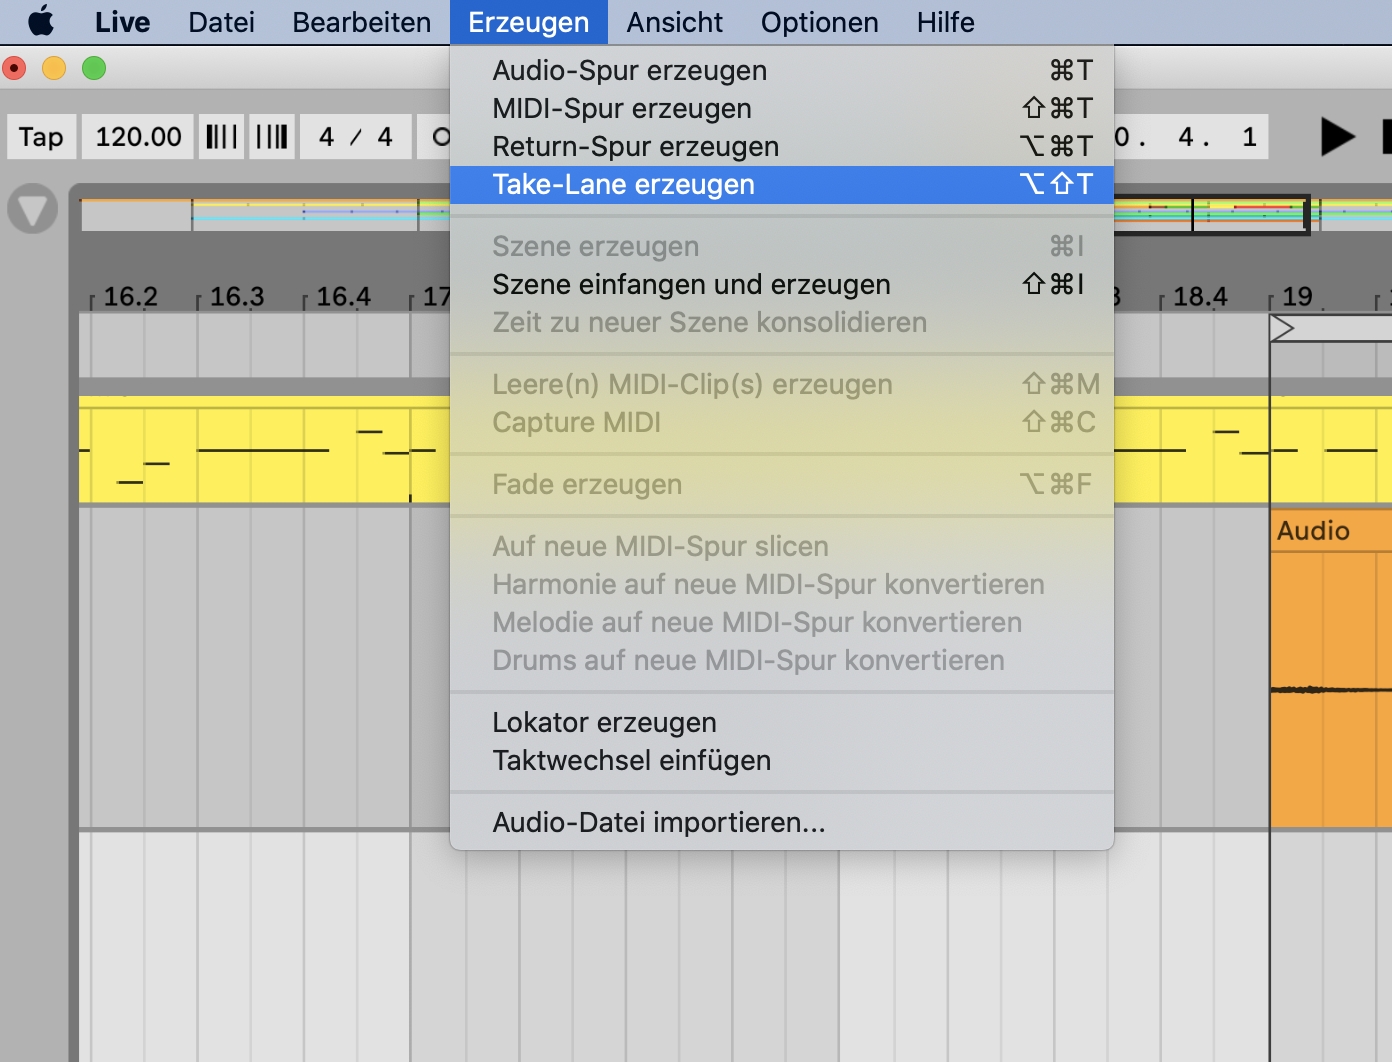
Following the principle described above, you can also make MIDI recordings and assemble a final take from the take lanes with just a few clicks. But how about a video to go with it? Create a new audio track for this. Go to the Create menu and select Create Take Lane. Generate several take lanes this way.
6 Create a video clip
Load a video into each take lane. Select a part from a lane by measure length or beats, and press the Enter key. Repeat the step in the other lanes so that you have a varied but beat-synchronized video clip in the final take in seconds. Export it via Audio/Video!
