Mix-Tricks: Compressor before or after EQ?
1 Compressor & Reverb
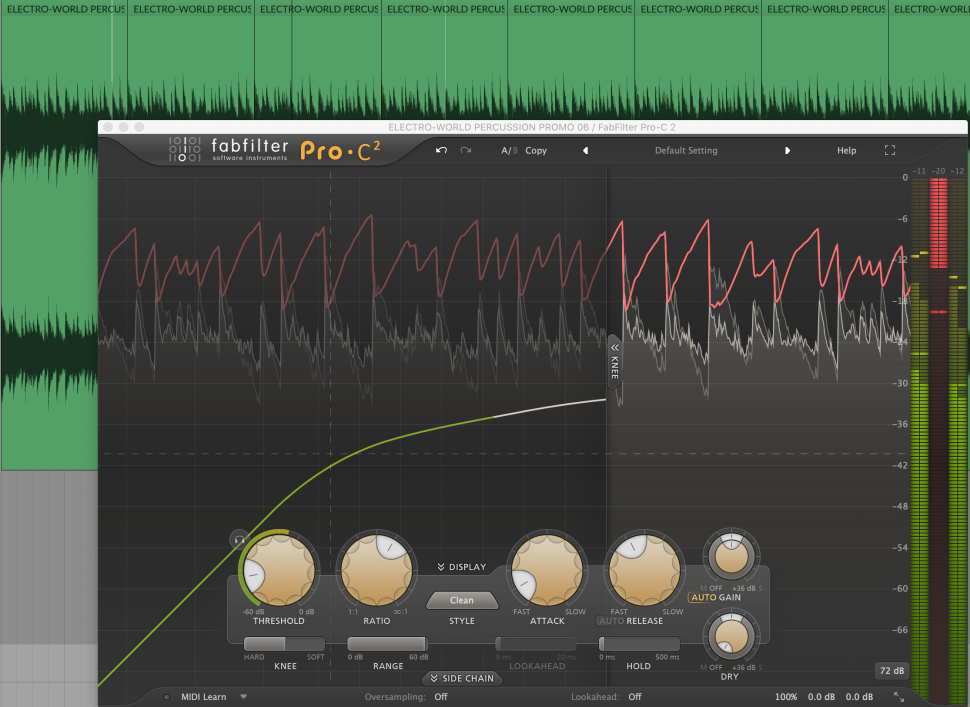
Load a drum loop into your DAW that is not too full in terms of sound, such as a percussion loop; place a compressor on its track and let it pack a punch. This means a relatively low Threshold with a high Ratio, so that the loop pops properly. In our example, we use the FabFilter Pro-C, with a Threshold of -40 dB and a Ratio of 4:1.
2 Reverb
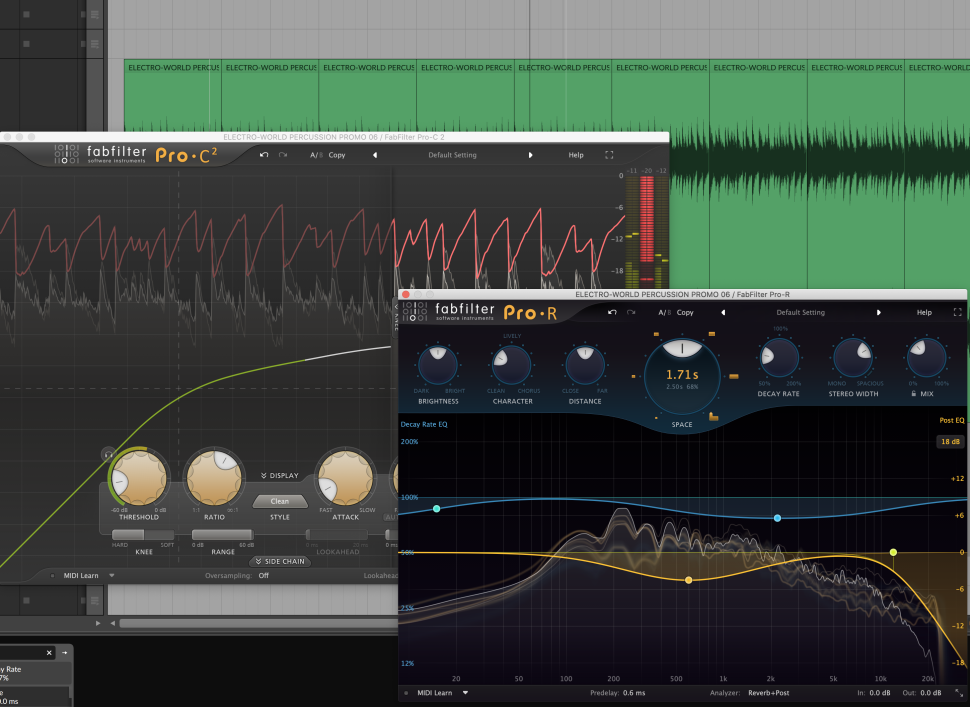
This is followed by a Reverb with a relatively short decay time (Decay), which you set to 50% wet. The loop moves away from you in terms of sound. Now swap the order of reverb and compressor. Now not only is the sample compressed, but so is the reverb tail, which makes for a pumping sound, especially in the quieter parts of the loop.
3 Delay
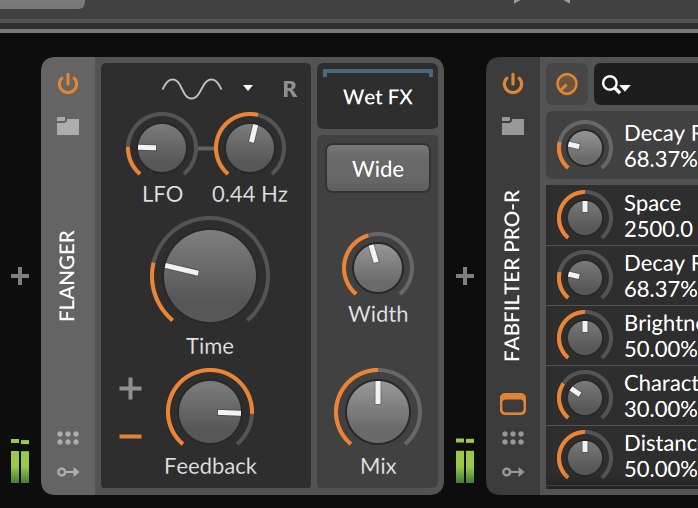
It is here that the compressor can really work and boost the signal. Using the same principle, a Delay instead of the Reverb creates great effects. Tip: Place a Flanger at 50% wet between your effect and the Compressor. Almost philosophical is the question of whether to place an EQ before or after a compressor. 1
4 Lowering
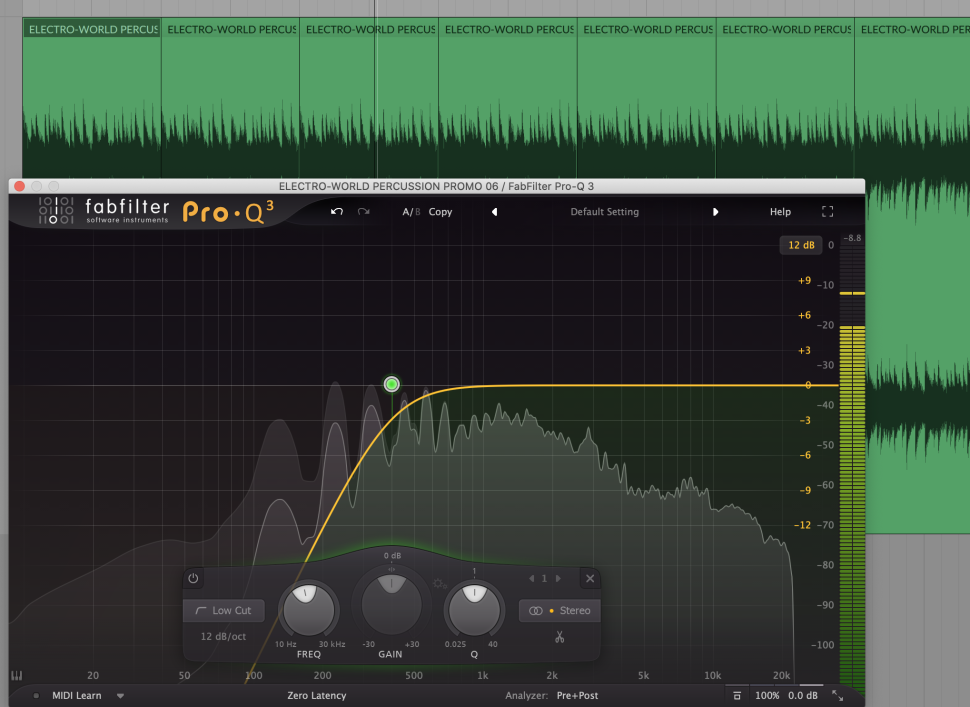
The first variant is quickly decided: If you want to cut frequency ranges of the signal, the equalizer must come before the compressor. Otherwise you will compress the unwanted frequencies and unnecessarily rob the rest of the energy. To test this, load another drum loop and cut everything below 400 Hz using a Lowpass filter. 1
5 Clear matter
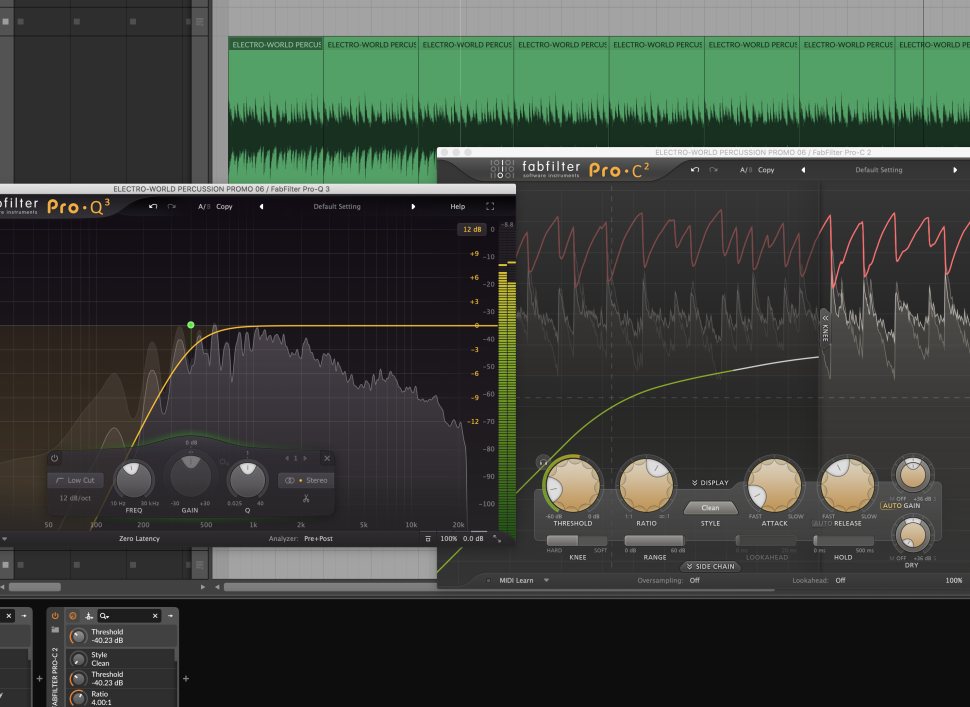
This is followed by the Compressor from the previous example. If you swap the effects, you will notice that the variant with the trailing equalizer is quieter, since the bass was also compressed. When cutting frequencies, the EQ is recommended as the first effect. If you want to boost frequencies again, the following should be taken into account ... 1
6 Lifting
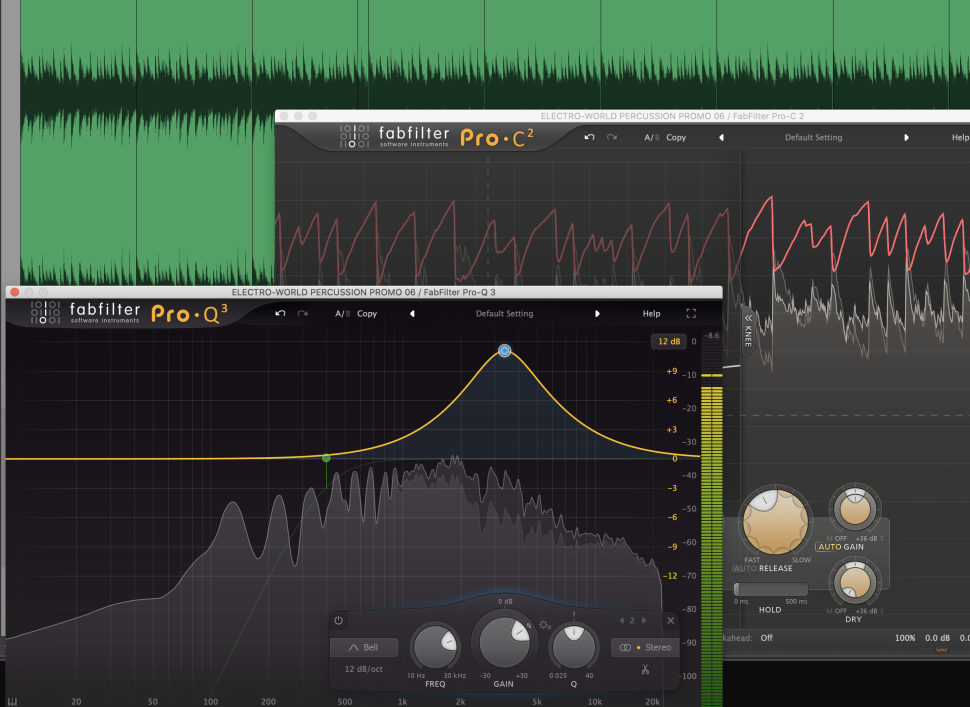
A boost is all the more noticeable when compression is applied afterwards. In this case, you have better control with an equalizer after the compressor; however, in the end, taste and a pinch of sensitivity are decisive here, because the sonic overemphasis of a frequency can be quite intentional
Want more? Get more!


Subscribe to the digital edition of BEAT Magazine via Plugins-Samples.com and get more gear, in-depth workshops, reviews and 11 GB exclusive plugins and new sounds with every monthly issue!
Subscribe to Beat Magazine for only 4.99€ per month