Stumbling blocks and how to avoid them (4/4)
1 The intro
Whether it’s a DJ mix, meditation cast or interviews: An intro is a must. With it, you can pick up the listeners, give them an insight into what they can expect and convince them that it‘s worth staying tuned until the end. An audio logo is also always a good idea: a combination of music and the name and claim of the podcast in 5 - 15 seconds.
2 Audio logo
If you don‘t have your own music, you can find lots of material at Soundstripe and Envato‘s Audio Jungle. Speech for the introduction is no problem either, speech services with TTSMP3 and Play.ht can help you out. The latter even offers 144 languages, so that the intro can be designed to perfectly match the content.
3 Content, then errors
IOnce you‘ve got the intro in the can, it‘s time for the sequence. Here‘s a first tip: Don‘t overdo the post-editing. Due to the sheer length of podcasts, removing crackles, coughs, or small noises can turn into days of Sisyphean work and kill any fun. Tip two: first content, then noise.
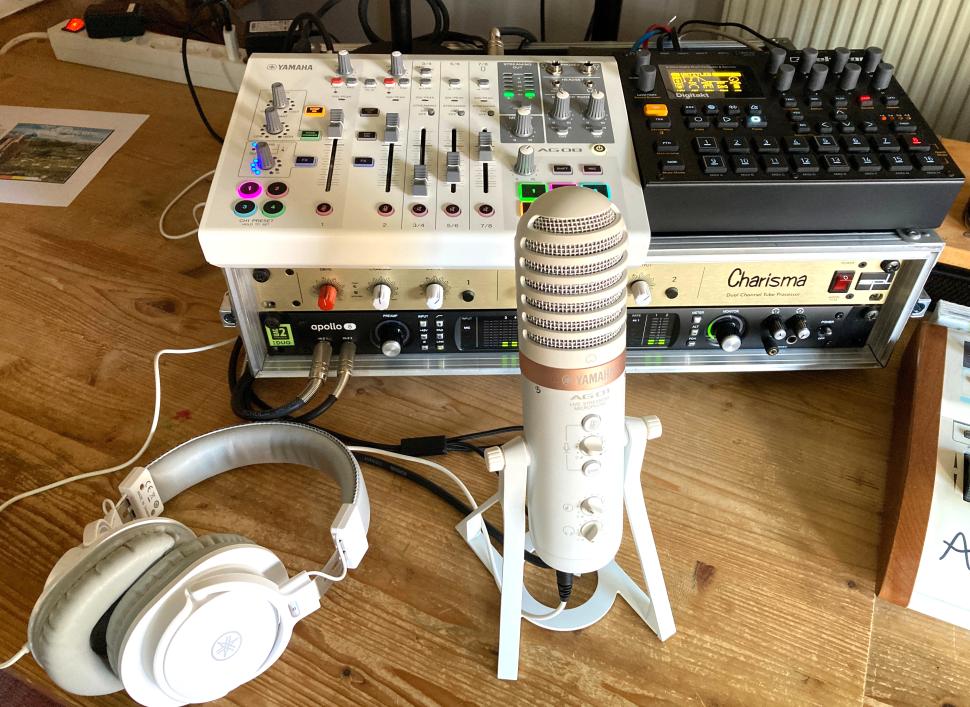
4 Which software?

Otherwise, you might fix mistakes in places that will fly out later. For editing, we use WaveLab Cast, which is included with our Yamaha AG08. Alternatively, you can use Audacity or a DAW. WaveLab comes with tools tailored to podcasts, such as DeEsser, Voice Exciter and Noise Reduction, so it‘s our favorite.
5 Find peaks
As you can see in the picture, our podcast contains nasty peaks that not only disturb the ear, but also cost us headroom. To contain them, we right-click on the audio file and select Edit Source. In the waveform, we click on the first peak, zoom in using the zoom preset „Show 2 Seconds“ (or CMD/STRG+mouse wheel) and select the area of the peak.
6 Contain peaks
If this overlaps other, different signals, we reduce the volume. About 4 dB is a good guideline, this will catch most of the outliers. If this is not enough, reduce again by 4 dB. If the peak is completely free, we simply cut it out completely. If this results in pops, use fades to compensate.
7 P, S and T sounds
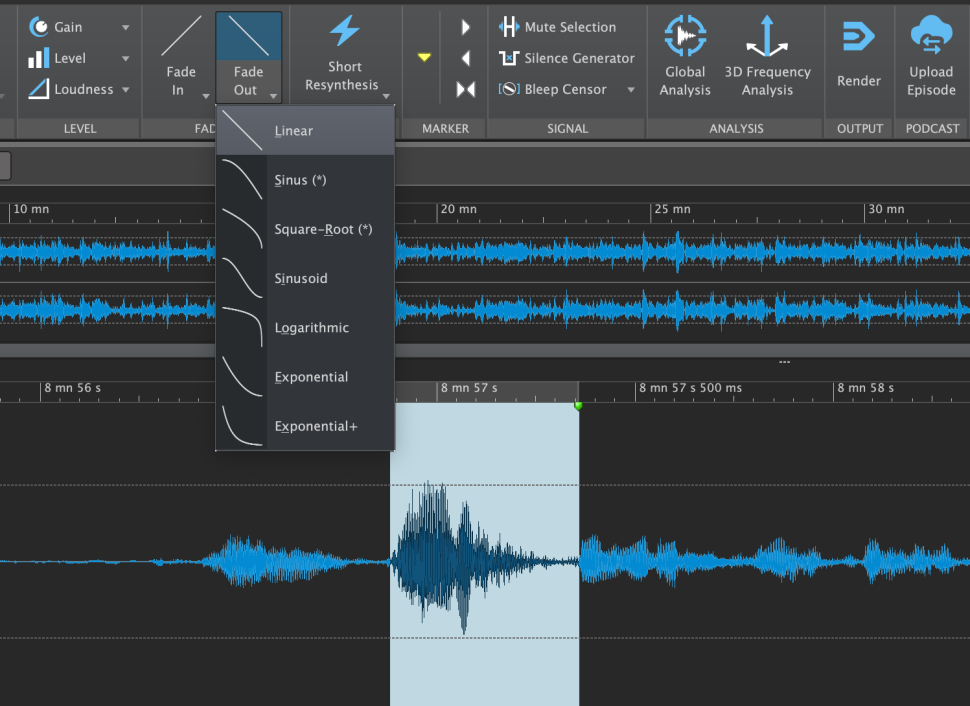
By the way, if cutting or reducing doesn‘t help, fades are also a possible solution: select the peak and let it fade out and put a short fade-in behind it. In some cases this helps more than cutting. Repeat these steps for all other peaks and interferers. You can also contain overly loud P and T sounds in the same way as peaks.
8 Normalize

For S-louds, Wave Lab offers an effective tool. Before we use this live effect, however, we normalize the recording via the Loudness option when all peaks have been removed. As a Max Peak Level, -1 dB is a good value to keep some headroom. By the way, now is a good time to save the file.
9 Make a backup!
Since we are currently working destructively, be sure to make a copy of the original recording before saving, so that you have a backup to fall back on in case of any errors. Then, switch back to the multitrack view (the tab with the double waveform icon), select the track with the recording and switch on the DeEsser on the left-hand side.
10 DeHummer & DeNoiser
All effects are calculated in real-time and work non-destructively, so you can try them out and correct them at any time. The DeEsser‘s reduction works very selectively, even if you turn it up to full. Mains hum can be easily removed with DeHummer, as can the noise floor with DeNoiser.
11 Refine audio
The Listen function lets you hear exactly what DeHummer and DeNoiser are cutting away. In the Enhance department, the Voice Exciter is our friend for beefing up voice recordings, but we use the effect rather sparingly, so that the ear doesn‘t get used to it too quickly and you tend to overdo it.
12 Problem: Reverb
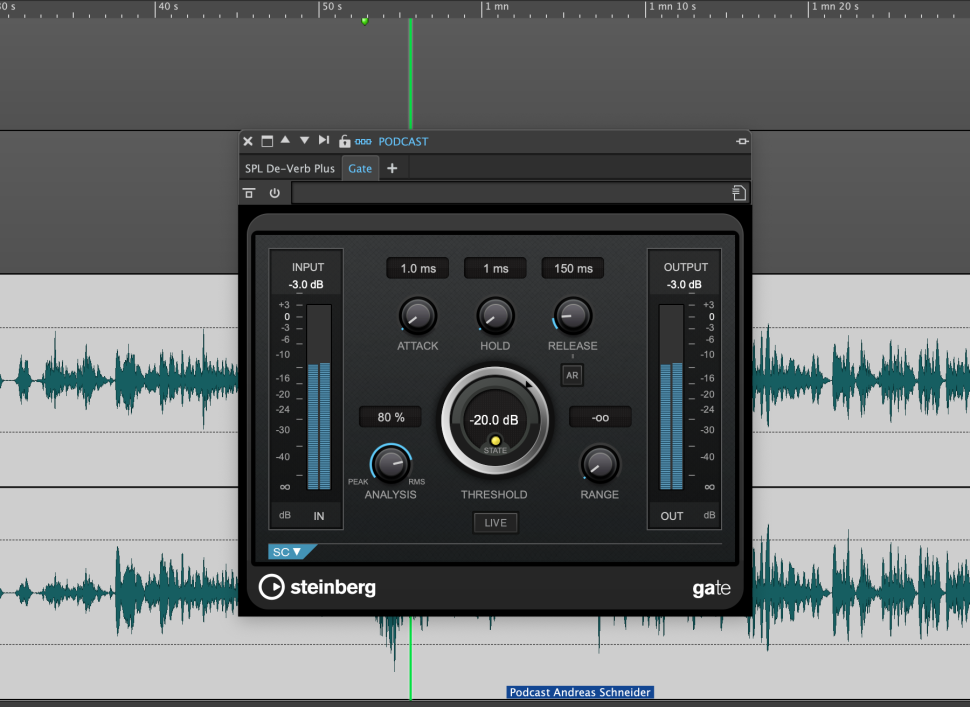
A moderately severe problem we have with our recording is the reverberation of the room and, unfortunately, there aren‘t many reliable solutions for that. With a little luck, you can cut the reverb with a gate if you set the THRESHOLD relatively low and experiment with RELEASE until the result sounds halfway satisfactory.
13 Rescuer in need
We emphasize „halfway“, because it won‘t be perfect with this solution. The ultimate heroes in this respect are SPL De-Verb and DeVerberate by Acon Digital, the latter being the ultimate specialist for perfectly removing even nasty reverberation, while extreme settings with De-Verb can lead to somewhat choppy speech.
14 Mix tracks
In our case, it helps anyway, which is why we get a clean recording as a result. Last important step of the post-processing: in the TRACK INSPECTOR you will find the Gain control for each track in the lower left corner. This is hidden by default, so we fade it in and bring all existing tracks to a homogeneous level.
15 Limiter & Export
Finally, we switch from TRACK INSPECTOR to MASTER SECTION and load a Limiter into the first free slot. Find the loudest parts of the sequence and set INPUT so that the Gain Reduction (GR) is set to a maximum of -3 dB. Rather less than more. Then, set OUTPUT to -0.3 dB, save and export. The result is ready!
Read more:
Want more? Get more!


Subscribe to the digital edition of BEAT Magazine via Plugins-Samples.com and get more gear, in-depth workshops, reviews and 11 GB exclusive plugins and new sounds with every monthly issue!
Subscribe to Beat Magazine for only 4.99€ per month